ruckertopia
7795
16
6
fair warning: This is going to be a large post. I'm going to go into detail describing design decisions and my thought process as I designed and built this stock, especially as it pertains to 3d printing. If that doesn't interest you, here's the TL;DR: Over the last year and a half or so, I designed and 3d printed a rifle stock. The shape of the stock was inspired by a few different stocks, the front half by the KKC stock on my 10/22: https://i.imgur.com/QcyjXOy.jpg, and the rear half was very roughly inspired by the McMillan A4.
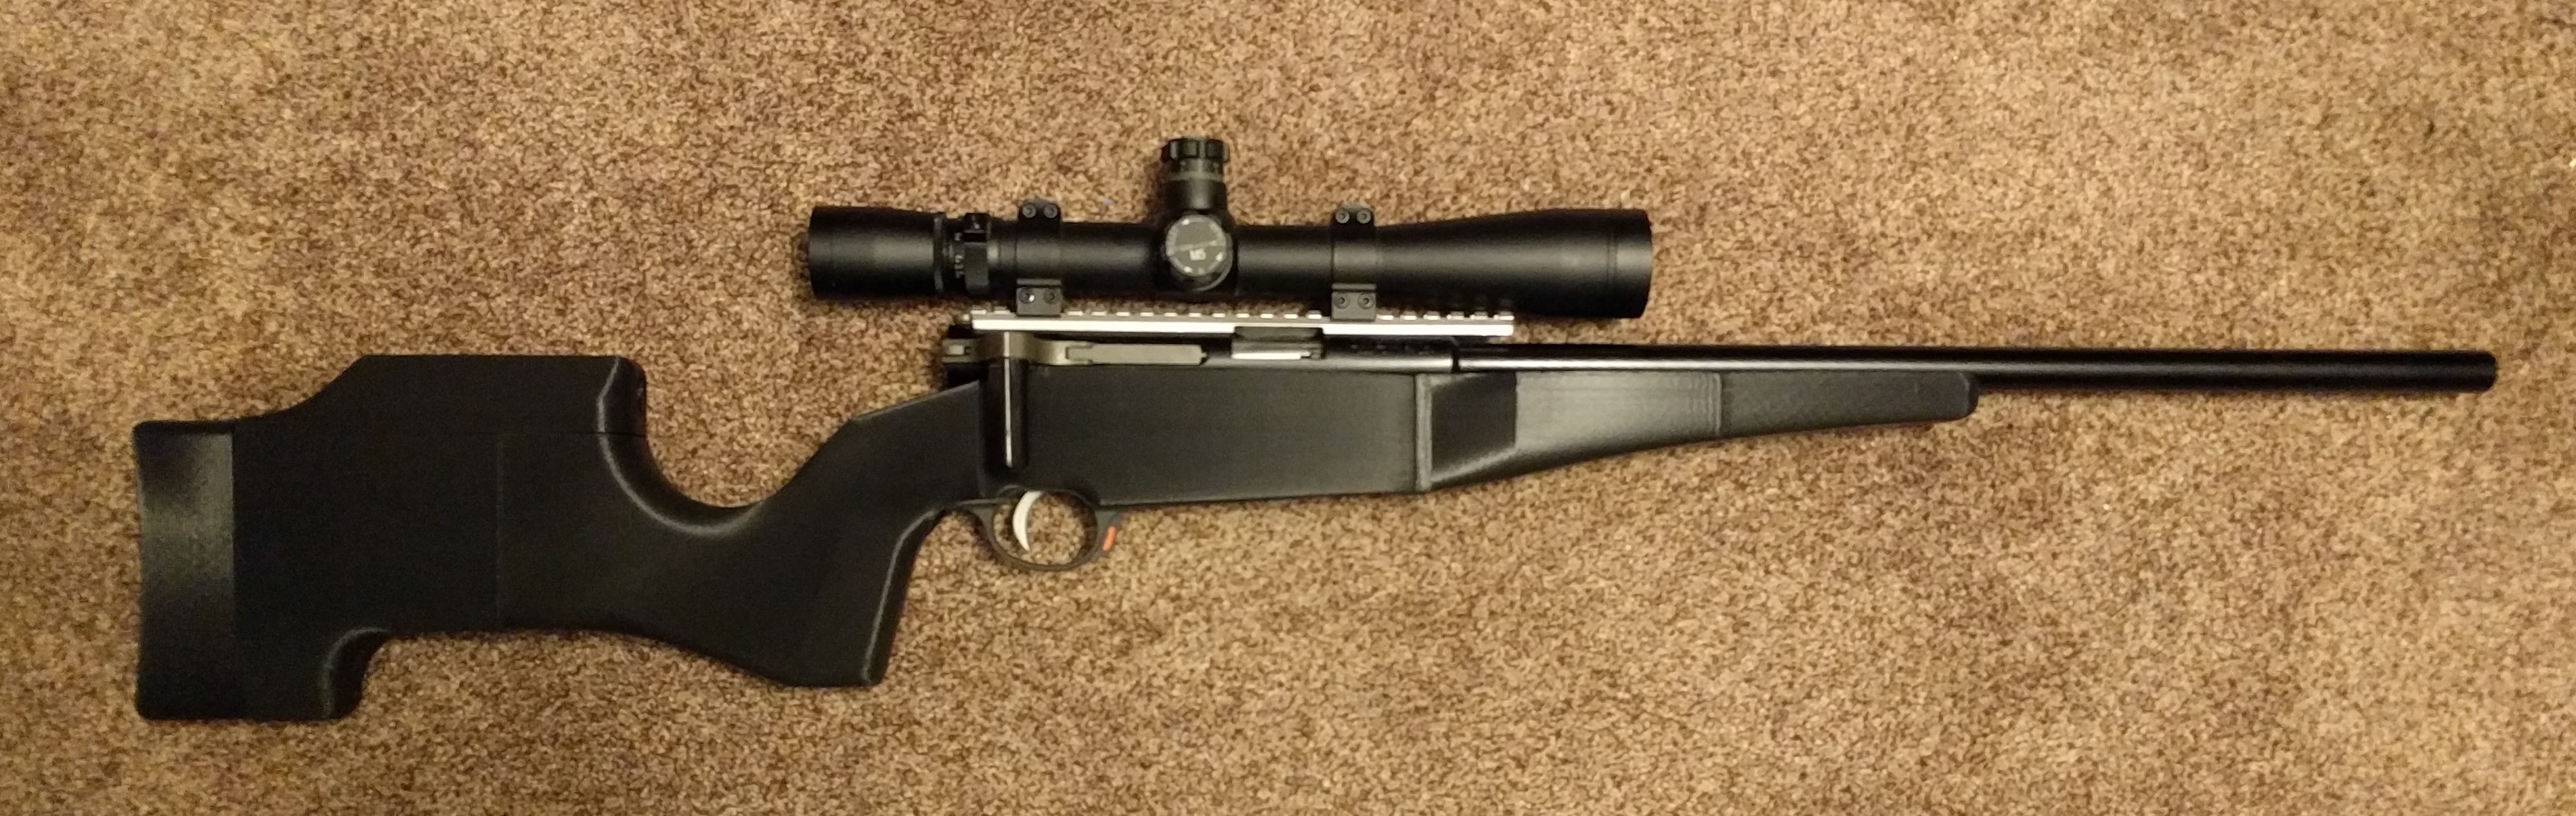
Pictured here is the first functional prototype.

This is an Izhmash 7-2, the most basic version of the biathlon rifle made by Izhmash. It's a pretty neat rifle, but it was made with the intention of being used with a scope, and the factory stock is not made with that in mind, which means it can be difficult to line up your eye with the scope. Instead of modifying the original stock, I convinced myself that I could do better. About the same time I purchased this rifle, a friend convinced me to buy a 3D printer, and that's where this all began. (The magazine pictured here is also 3d printed, but that's another post for another time)

I spent a LOT of time designing this stock in CAD. One of the great things about 3D printing is rapid (and cheap) prototyping. I would slice parts of the stock and print them to see how things fit. Eventually I ended up with version 1 (the first picture in this album). Version 1 was printed on an extensively upgraded monoprice maker select V2 (A pretty inexpensive printer) and had some problems. There was some pretty severe warping of a few parts, and I was never happy with the shape of the grip. About 6 months later, I purchased a larger printer (CR-10 S4). The main body of the stock was printed in 5 parts with the old printer, and only 3 with the new printer.
Pictured here are a few very quick, low quality prints of various iterations of the grip. This was the hardest part to get right.

The first major upgrade I made was to change where the stock was broken into parts for printing. I wanted the action of the rifle to be entirely on a single part, so I had to split the stock in front of and behind the action. The rear split ended up being in the wrist of the stock, Usually the weakest point of a rifle stock. To help reinforce this joint, I added a couple 1.5" long 1/4" bolts. These thread directly into the plastic (the threads were modeled and printed). I did a fair amount of research, and for this type of joint, threading into the plastic is plenty strong. (more on this later) The 3 parts are joined via dovetails, and simply glued together.
Here you can see two of the dovetails on version 1 of the stock.

The next upgrade I made were replacable grips. The cheekrest and buttplate were already replacable in the first version, allowing me to change the length of the stock, or the height of the cheek rest by simply printing new parts. I've made a few different versions of the grip, and am still working on a set that fit perfectly.
Pictured here are 3 different rough draft iterations. The current iteration is a slightly smaller version of the one closest to the camera. The final version will be printed at a higher quality.

The third upgrade is to improve how the rifle sits in the stock. In the first version, I quickly discovered that screwing the action screws against the plastic of the stock resulted in them coming loose pretty quickly. This time, I designed and had a friend with a lathe make a couple pillars. The pillars slip into the stock, and are then bedded in place with bedding compound (epoxy). Now the action screws are tightening against aluminum instead of plastic.
In this picture, the pillars are the silver aluminum cylinders bolted to the bottom of the action.
This is also the first picture where you can see the latest version of the stock in all of its glory, but let's not get ahead of ourselves.

I didn't want to worry about the stock not being strong enough, so I printed pretty thick walls. The three parts of the main body of the stock took 77 hours total to print. Here is the middle section about 1/4 of the way done (foot long ruler for scale). On the first version of the stock, I took this part, which looks fairly weak, and stood on it, trying to collapse it. It barely moved. Over 200 lbs, and I'd call that plenty rigid.

Here are the bolts I mentioned earlier, and the dovetail that holds the butt of the stock onto the rear of the grip.

Here's a cutaway that shows some of the features I mentioned above.
1. I've included some counter bores for the bedding pillars. I modeled threads into the holes as an easy way to add texture for the bedding compound to grab onto.
2. Threads for 1/4" bolts. The threads are modeled directly into the stock, and the bolts thread into the plastic. These bolts are here to reinforce the dovetail that holds the two parts together. I was a little worried about the strength of the threads, until I found a video on youtube where someone did some destructive testing, and compared modeled threads with metal thread inserts, and I was very surprised by how strong they were. As long as you don't strip the threads while threading in the bolt, the threads won't be the failure point. Plastic threads might wear out faster, but I never plan on removing these bolts. I also used washers on the head of the bolts in an attempt to spread out the load as much as possible. The holes for the washers are large enough to leave a decent cavity to add weights if I need to balance the stock.
3. I use socket cap screws to hold the cheek rest on the stock. The rectangular hole allows a nut to slide down into the stock, and the screw intercepts it. Putting them at an angle does a few things, mostly it gets the holes for the screws out of the way of your cheek and makes it easy to install the nut. I used nuts here instead of modeled threads because I expected to have to remove the cheek rest, and didn't want to worry about the durability of the threads.
4. Similar setup for the buttplate, but I superglued nuts into recesses in the stock. It's possible the nuts might pull out, but there's not a whole lot of tension going on here, it's almost all compression while under recoil.
5. Similar setup again, but this time for the trigger guard.
6. The two holes for grip panels use molded threads. I probably should have used nuts here, but oh well. Not really a critical part, and I printed the walls thick enough that I can drill and tap for larger screws if I ever strip them (Or more likely melt in metal thread inserts)

My first attempt at bedding the stock was a failure. The surface left by the 3d printer was too smooth, and the epoxy didn't adhere to it, so when I removed the stock, some of the bedding was damaged. I'll have to remove it and scuff up the surface with some sand paper before trying again. If you know anything about rifles, you'll notice that there's no recoil lug. The bottom of the action is scalloped, so that the bottom of the front and rear of the action acts as a recoil lug, spread out over a large surface area. Pretty neat design.
EDIT: You can also see the aluminum pillars in this picture.

This is where it sits now. There's still some work to do before this project is done. Once I get the action bedded properly, I'll finish the exterior of the stock. I'm planning on filling in the seams with bondo or something, and sanding everything down before painting it.
The buttplate and cheek rest pictured here are from version 1 of the stock, they worked well, so there's no reason to change them. I might add some texture to the buttplate and maybe use some plasti-dip or something, it's pretty slippery now.
Thanks for sticking with it this long. Stay tuned, I'll post more updates as I make progress!
johnrweathersby8888
Hi there - I know this is an older post, but did you iterate on the stock?
Sphinct182
yOu 3d pRiNtEd a GuN?!?
deoxyriboneucleicasshole
Dear lord I need to take some CAD classes I get too frustrated learning by myself but I want some to make my own Rem 700 stock. Good work OP