shanemweber
46279
78
1

I want to share about 2.5 months worth of work with you all. The Girlfriend and I wanted a new table that could use for our RPG games, board games and as a dining table. So I needed something that can have a flat inset TV, a large open vault area, and could be completely covered.
I Like so many others, instead of buying a table, I decided to spend more money and a ton of time to make it myself instead. I am not a woodworker by trade or training, so you won't see any fancy joinery on this bad boy, but I hope you enjoy looking at what I did and maybe it will inspire you to make something of your own.
Setting this up in the dining room this weekend was such a great feeling.
There are quite a few things I would do different next time, and I learned so much but overall I am really pleased.
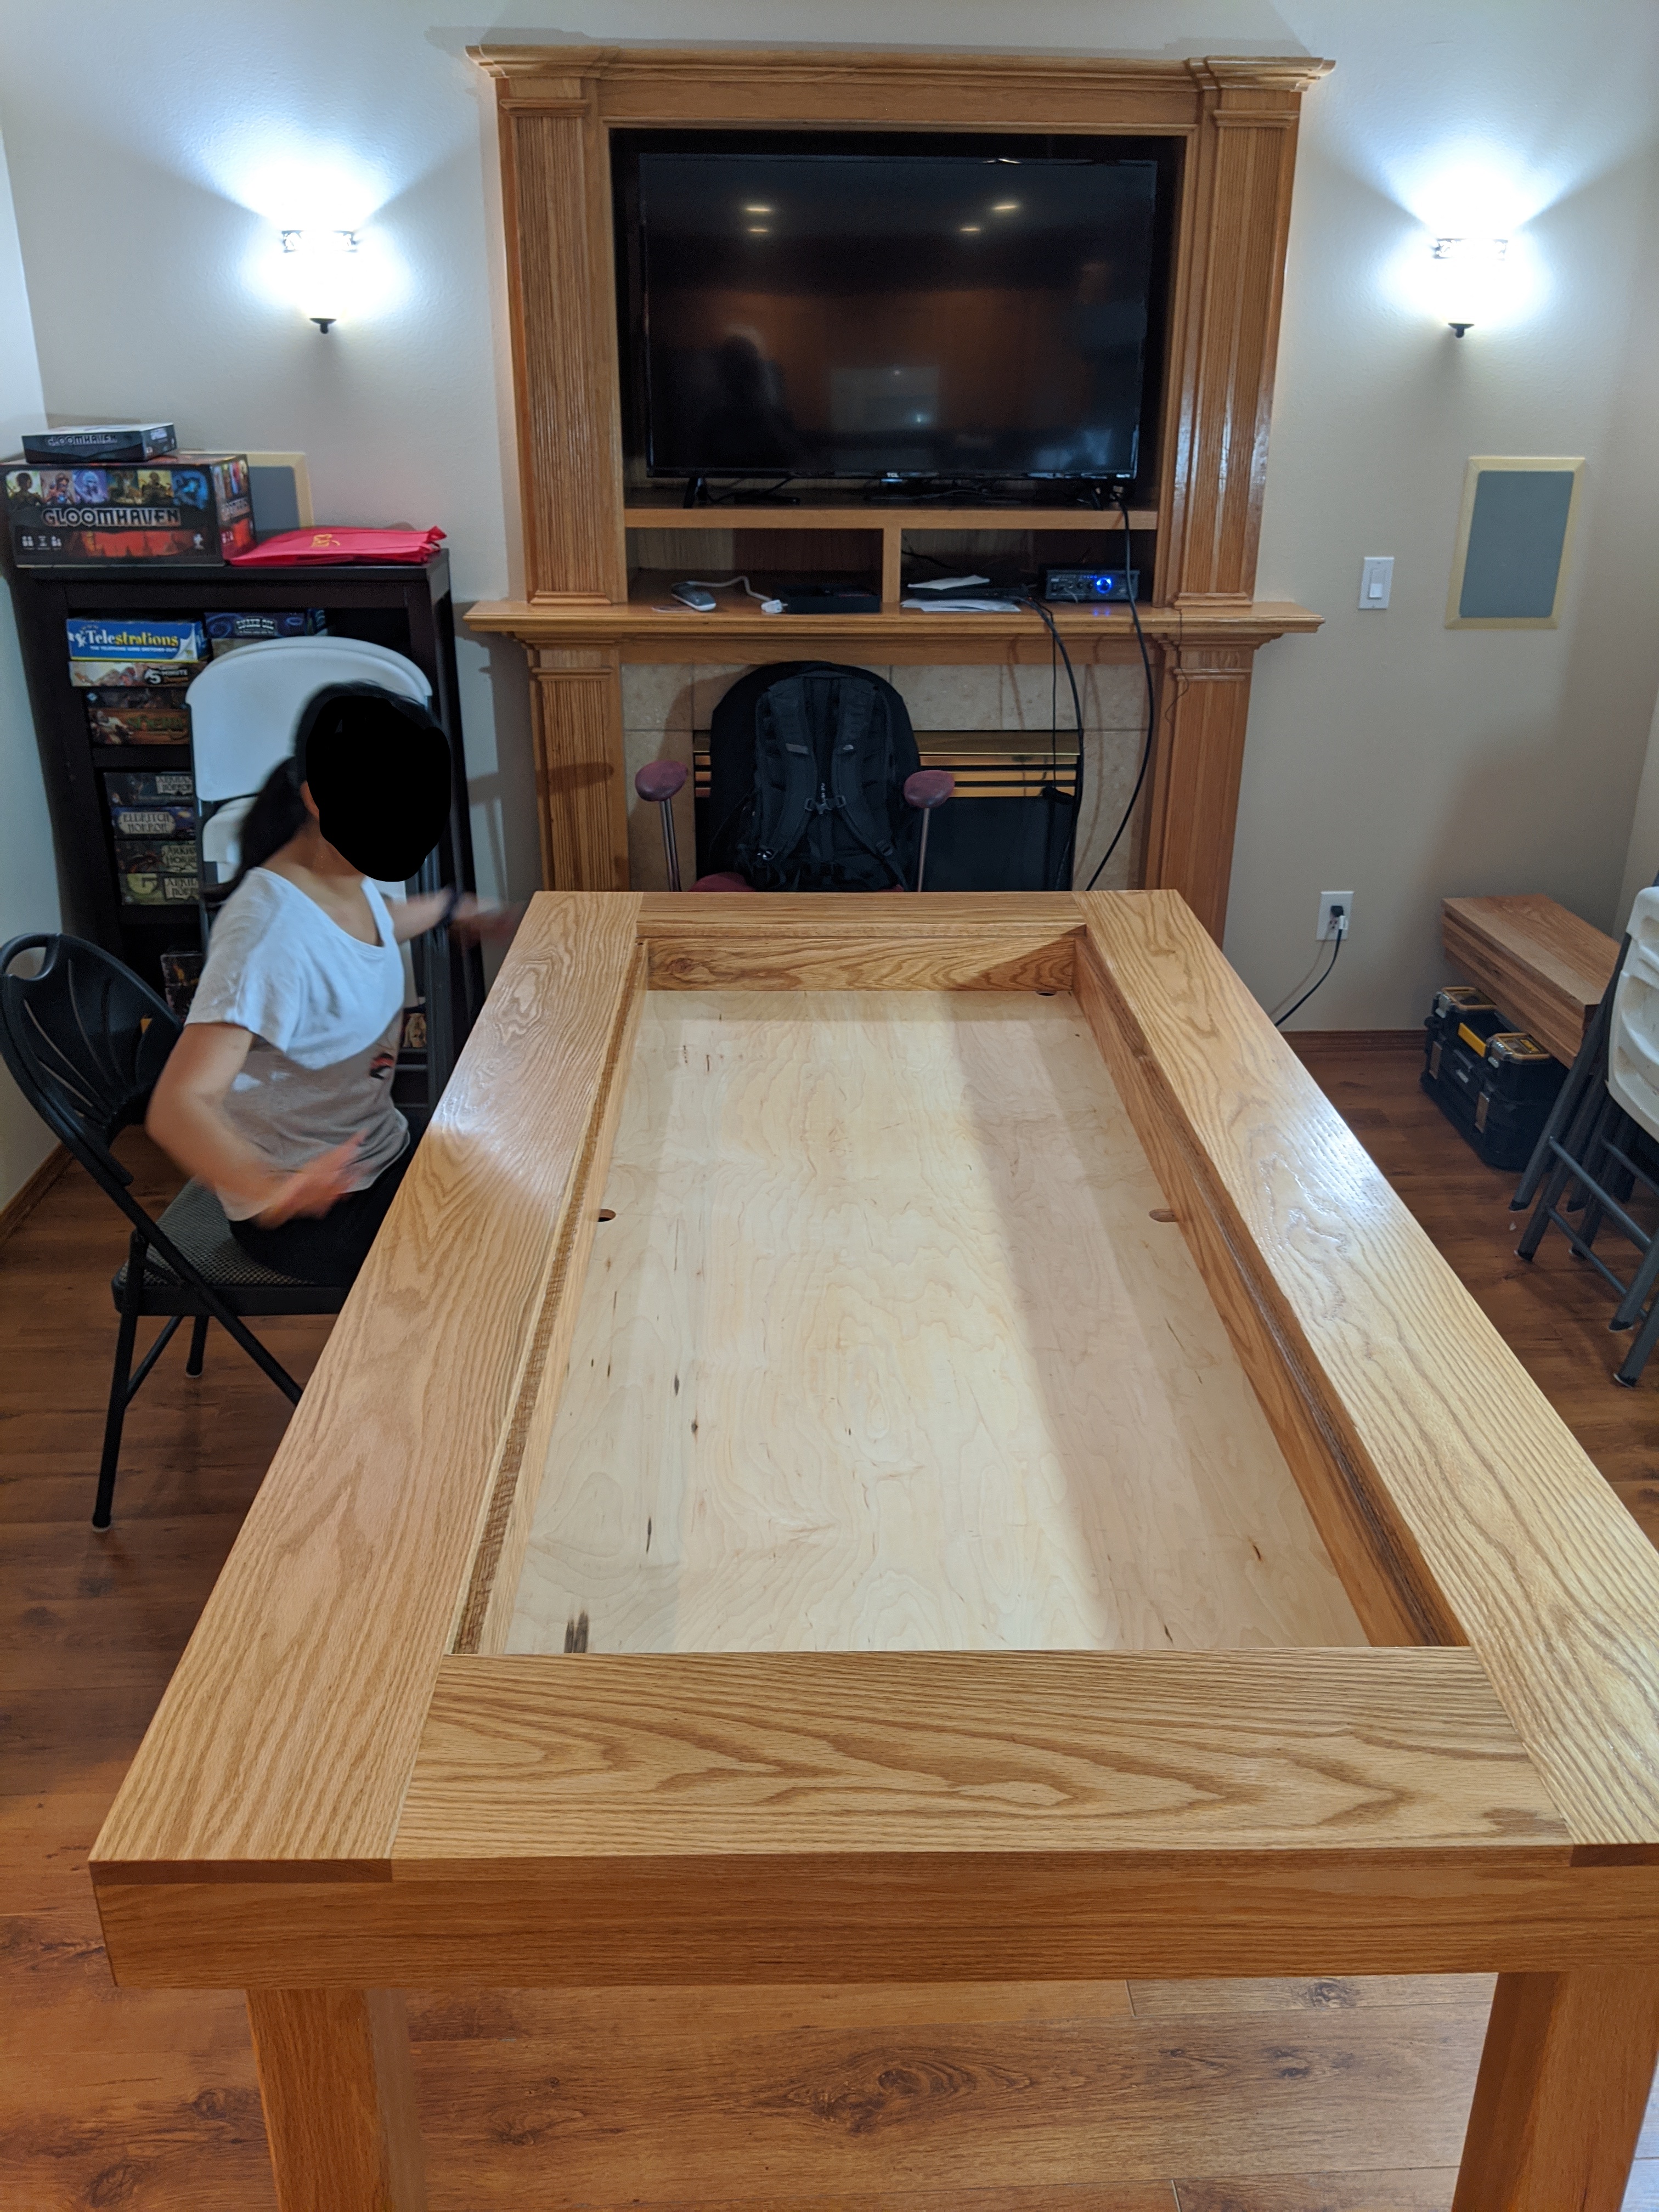
The table is made from Red Oak, around a Pine frame with a simple plywood vault bottom. The top is 43.5 inches by 84 inches, and the vault is 3.75 inches deep.
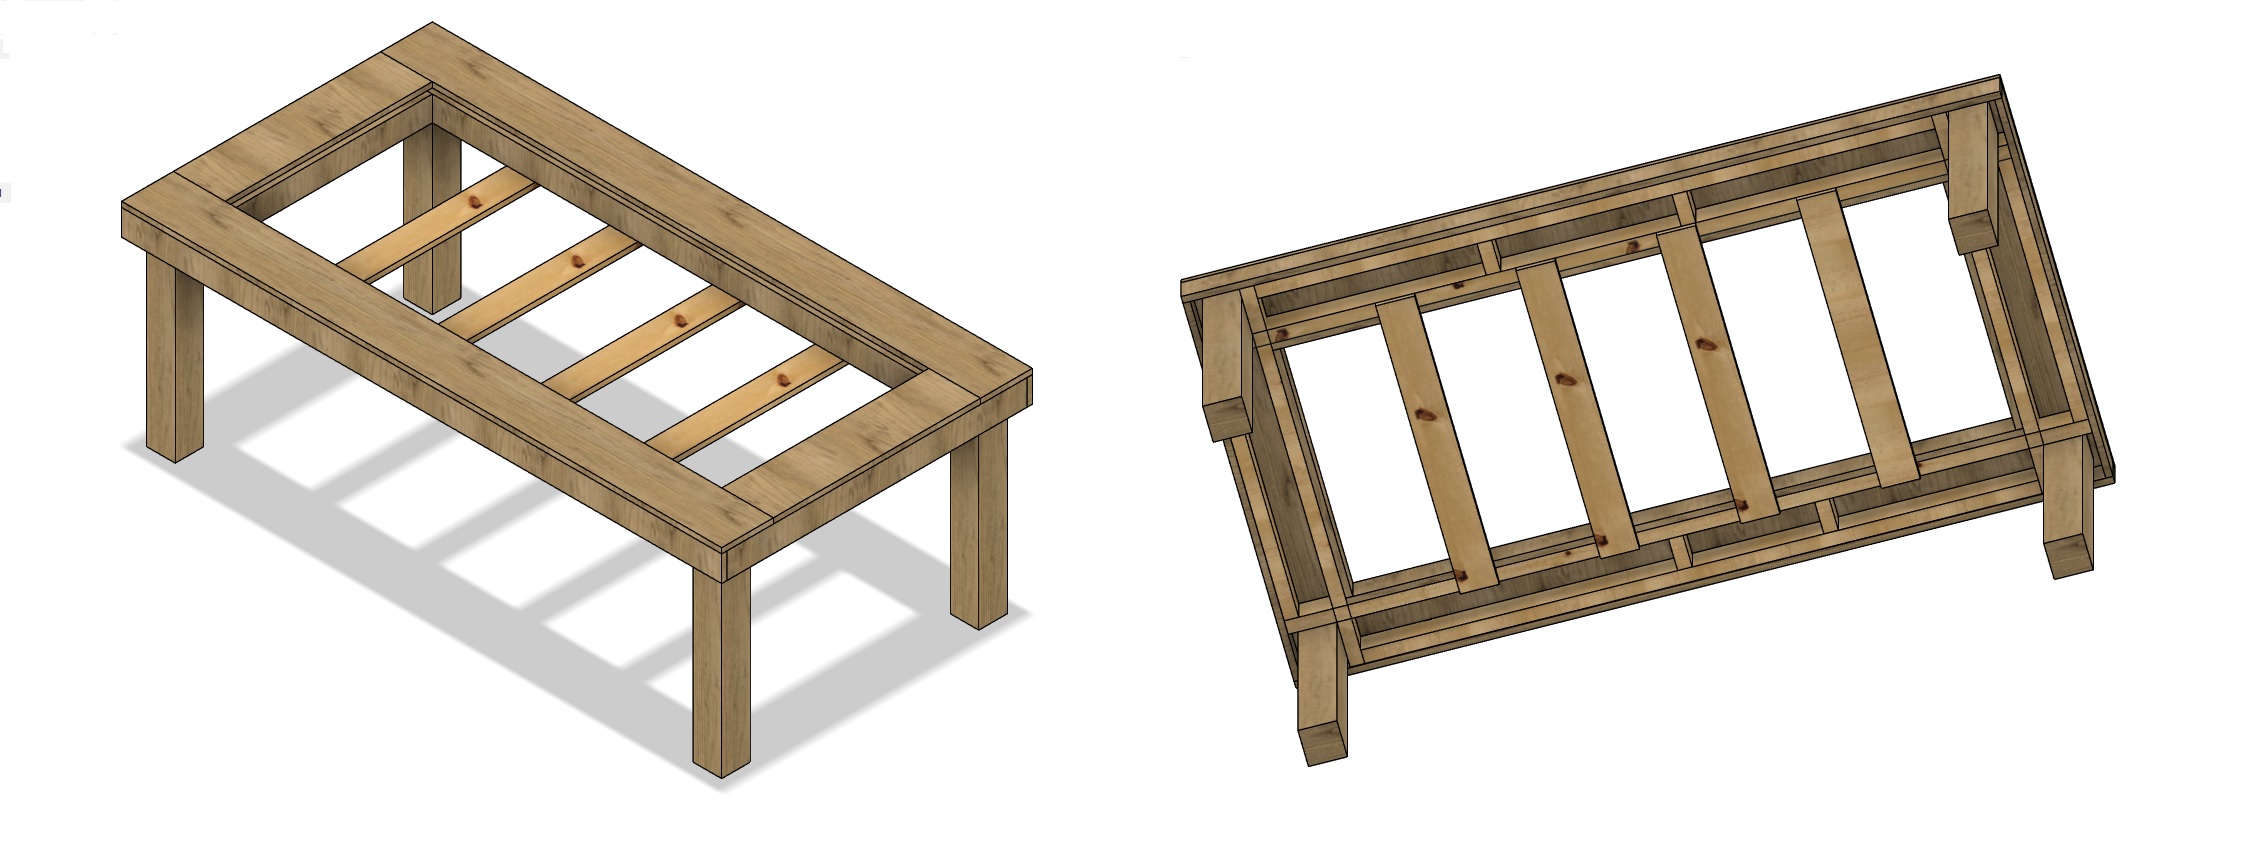
I did an initial design of the table in Fusion 360 since I already use it for 3d printing this was an easy tool for me to use, but you could use something like sketchup. This mainly helped me estimate all of the wood I would need and what cuts to make.

I ordered the legs for the table from tablelegs.com, next time I will try to make them, but they are 3.5 inches thick and 29 inches tall. Here I am mocking up the frame, the main bulk is held up by 2x4s joined with a half lap joint.

I am trying to figure out if the height is right, hence my beat up shop chair.

This is probably overkill, but you can see a few things. I have add outer beams on all sides and some support blocks to give the table top more to hold on to.
Also you can see where I secure the legs to the frame. I used 5/16 lag bolts screwed in from both sides of the table. Remember to make sure all of the holes are 100% the same so the legs are interchangeable, or be a normal human and label the legs.

Here I went around adding pocket screw holes so I could help secure the table top later.

Here I am gluing the table top together, there are plastic covered boards holding this up off the frame while the wood glue dries. I have a new found respect for wood glue, it is amazing.

With the table top put together, I added the outside skirts for the table. If you talk to a woodworker they will tell you that you can never have too many clamps, pretty much every week of this project, I went to get more and better clamps.

Did I mention clamps. Well clamps are the champs.
Here they are holding on the skirt on the inside of the vault. I could have left this bare pine, but I wanted the same finish all around, and needed something to set the table top inserts on.

I've cut the first few table insert, and the Girlfriend had to test the sturdiness of the legs and inserts. She was not disappointed!

Using clamps and boards to test fit the plywood vault bottom. Also apparently checking my notes?
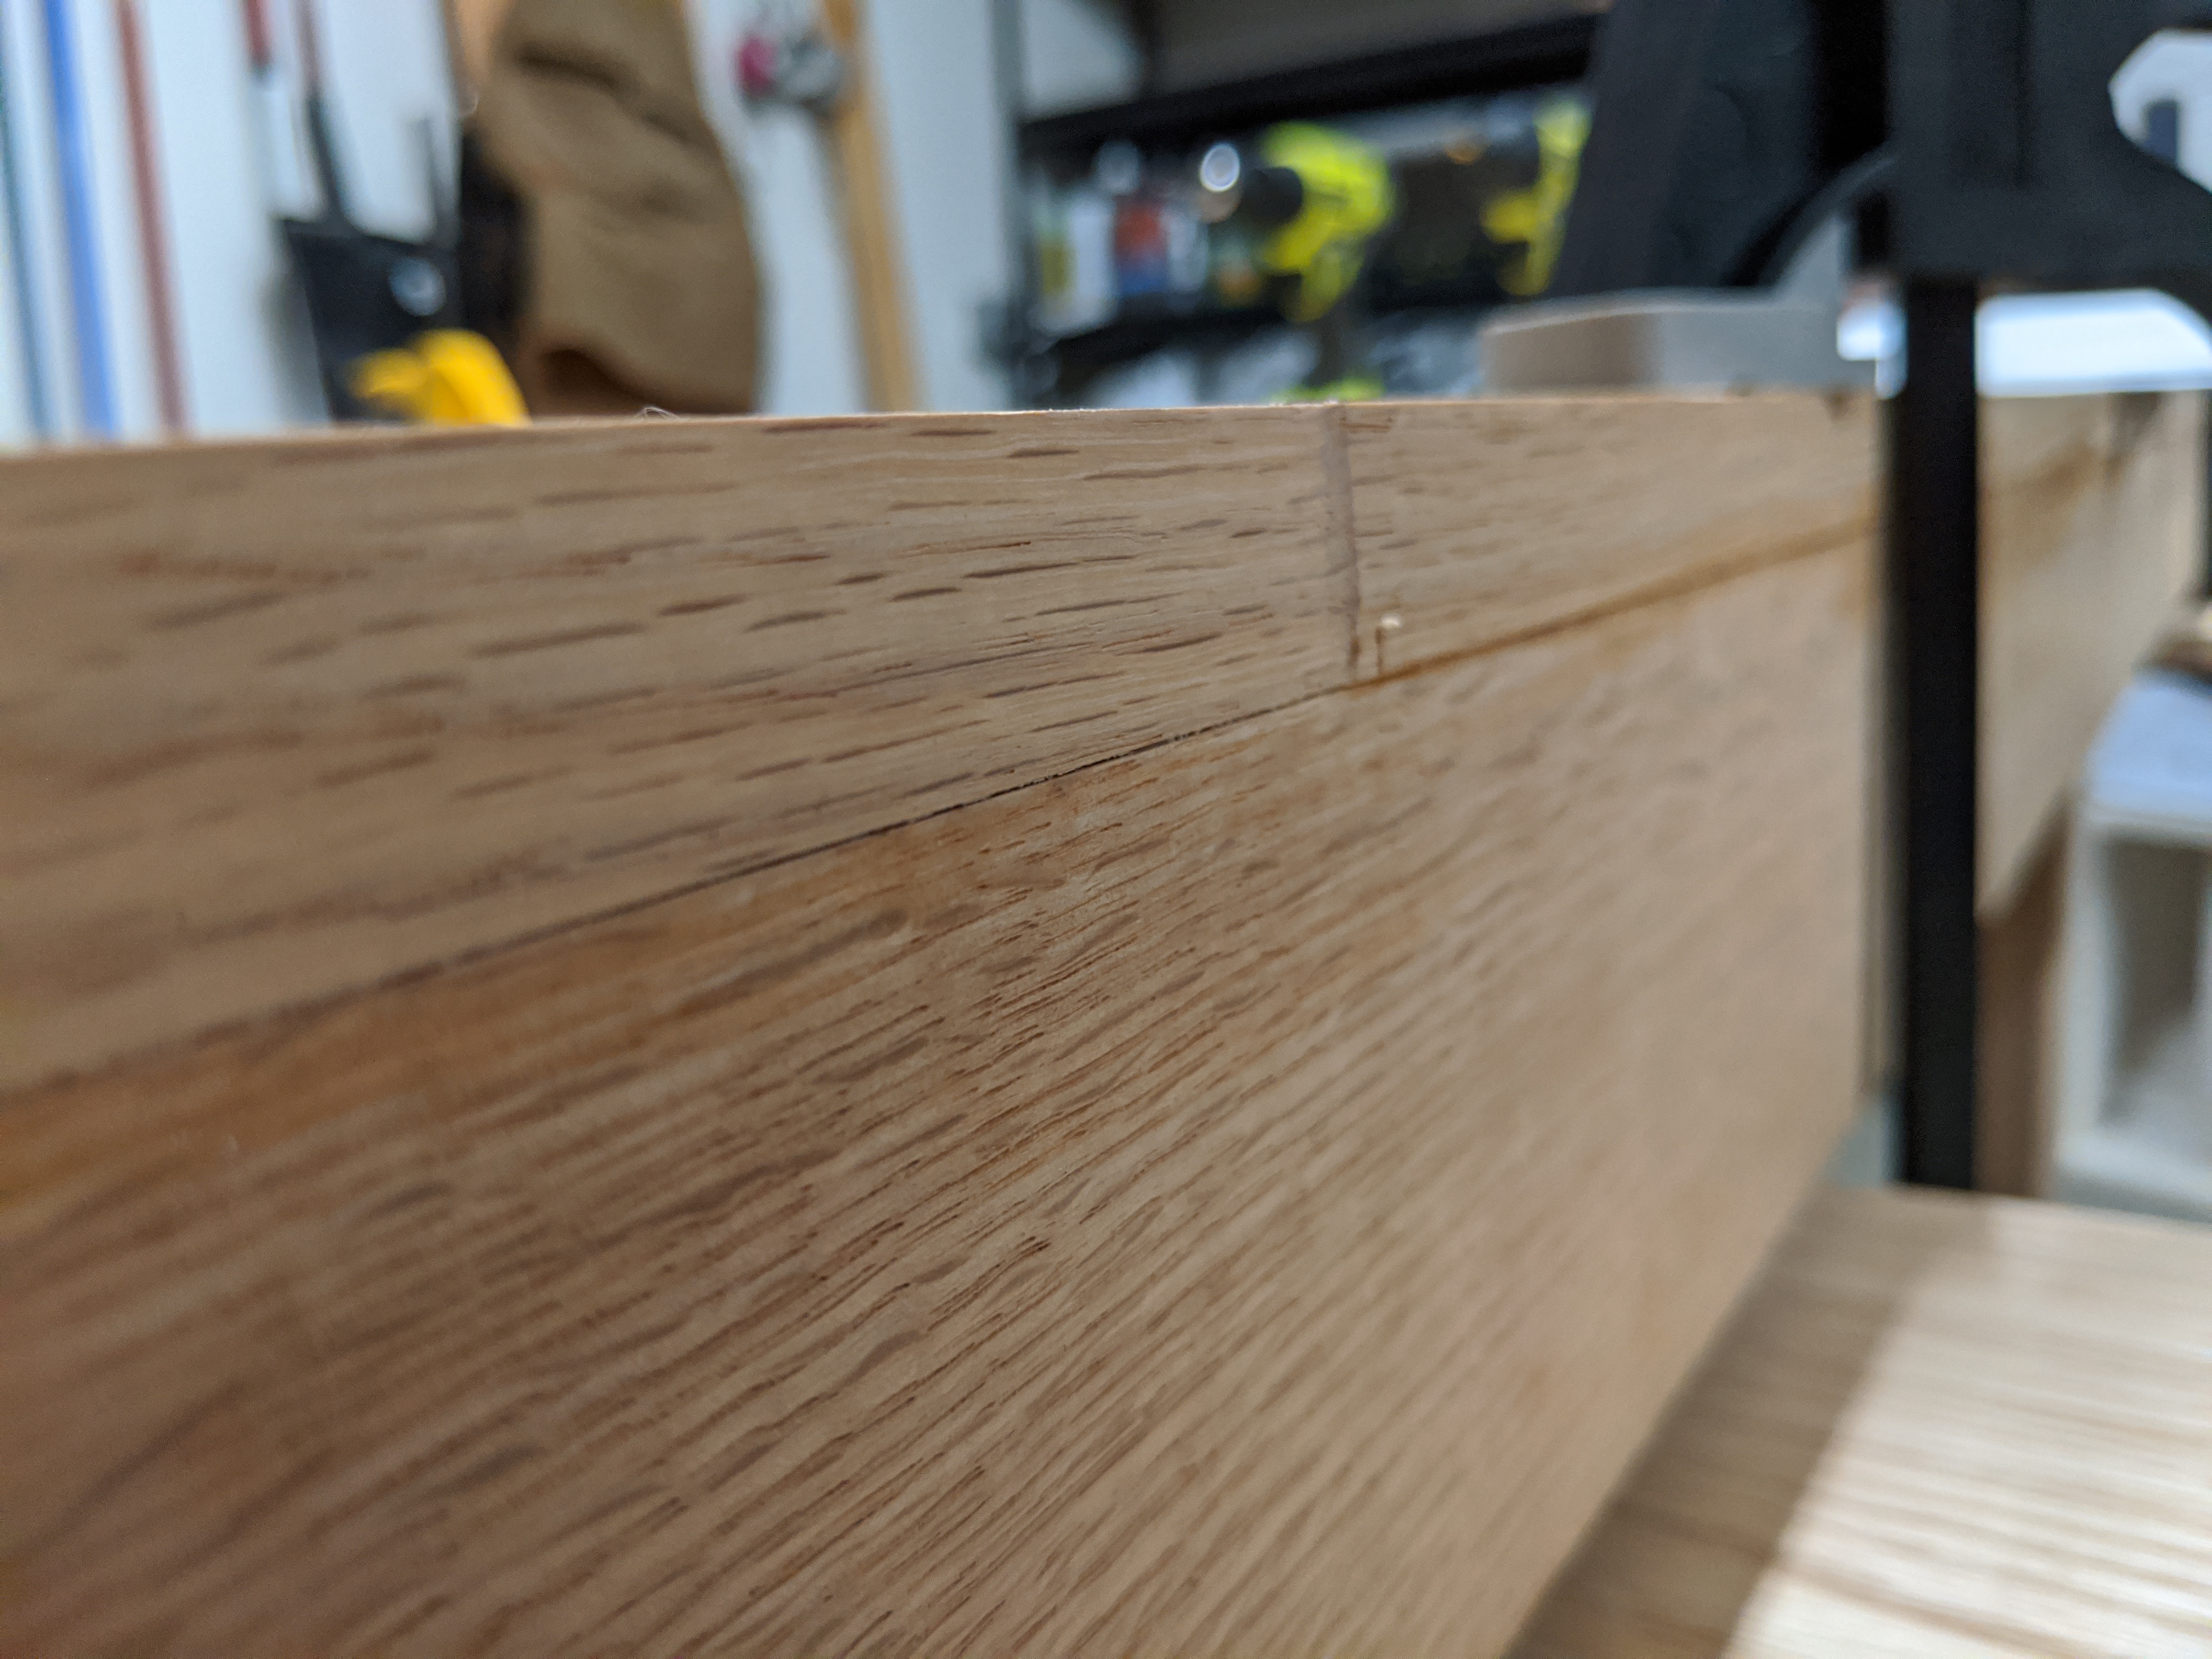
Here I am testing to see how close my flush trim bit will get the top to the skirt. The answer is, flush.

Since I am not yet a jedi, I needed a way to get the topper inserts out of the table, so I got a red oak 1/2 and 1/4 inch dowel, played matchmaker and married them together and drilled a hole in the vault wall. 1/2 inch halfway down, and then a 1/4 inch the rest of the way, so the plug sets in there nicely (after copious sanding) and now we poppin!

Time to accessorize. I built this frame to hold a tv that we are currently using for a Virtual RPG table top. The goal is to have this be removeable in case I want to use a different TV later. The odd design is to fit the back of my specific TV.

Said TV testing out it's new home.

Said accessory testing it's new home. Right now it's propped up to be flush with the table top, but the goal is have risers I can remove so the tv can set down in the vault and be covered by the table topers.
To make this work with the table width, I also had to cut 3 extra pieces to fill the gaps since the TV size did not work perfectly with the inserts I had made.

Since red oak has so many big open pores, and my gaming friends are messy, I decided to coat the whole time in watered down Timbermate wood filler to close the gaps and then sanded the crap out of it.
I started sanding at 80 then up to 120, up to 180, then up to 220. My girlfriends only requirements of the table are that it's sturdy and smooth, and she already tested the sturdiness.

After the sanding I sprayed the whole thing with a misting of water to raise the grain up, so I could sand it one more time.

Notice anything in this picture. The legs are different. I took off the good legs so I could sand and finish them separately, and made these terrible abomination legs out of scraps.

Ah, there are the good legs! I drilled a whole through a pine plank and into the bottom of the legs so I could hang them for finishing.

All of the table top insert bits laid out for sanding and finishing. You can see I labeled the inserts so I know what way they look and feel best.

For finishing I started with a coat of Danish Oil. Then applied 3 coats of Satin Polyurethane.
To save all of our sanity, I did not photograph the sanding and cleaning with the vacuum and mineral spirits each time.

More Danish Oil, poly and sanding.

Guess what, Danish oil, poly and sanding.

I forgot until now that I needed a whole in the TV frame so I could run power cables and HDMI.

Those cables need to be able to pop out of the bottom of the vault, hence more holes.
This thing is heavy, My girlfriend helped me move it in, but she was just barely able to get it into the living room. Thankfully it's here now and has it's nice legs back on!
You can see the table inserts in the upper right corner and the board games we will play over in the left.

Ah, all glory to the inset TV.
I didn't take a picture, but I bought and cut some plexiglass to cover the TV so we can draw and write on it, and it protect the TV.

When not on risers you can see the inserts fit cleanly over the TV to hide it.

Said risers, made out of the last scrap I had, and honestly the worst thing I have ever produced, but the raise the TV frame up and were cheap. I plan to 3d print some in the future, but for now these work.
I also have a big roll of neoprene that I intend to line the vault with, so I will need to adjust the height of the risers when that happens.

Overall this has been of of my most prod moments being a maker. My grandfather was a wonderful woodworker and I never spent enough time with him, or learned any skills from him. It's only that I am older do I really regret that and see what I missed.
Go build something, learn from your loved ones (in an appropriate socially distanced setting) and freaking play some games!!!

Also Cat Tax.
HandoB4Javert
Neat
SwordsToTheSkyWeRideAtDawn
★★★★★☆☆
IAmTheMightyLeon
You sir, are quite the craftsman. Your Grandfather would be proud
Goldenteckel
BramGallagher
Dang buddy you planning on parking a car on that? Looks beefy
shanemweber
If it's worth doing it's worth over doing i guess
UnitConversionBot
43.5 inches ≈ 1.105 metres
UnitConversionBot
29 inches ≈ 73.7 centimetres
UnitConversionBot
3.5 inches ≈ 8.89 centimetres
UnitConversionBot
84 inches ≈ 2.13 metres
UnitConversionBot
3.75 inches ≈ 9.525 centimetres