jodomakes
382
7
1

Since I got a few questions on how this was built here's a few build details, hope it makes sense

The shell was designed in 4 parts in blender and printed in 4 parts in a Photon Mono Resin printer

top bit

back panel

The front panel

not a great photo but the light is a clear resin print designed in blender with an RGB LED behind it to change the colors
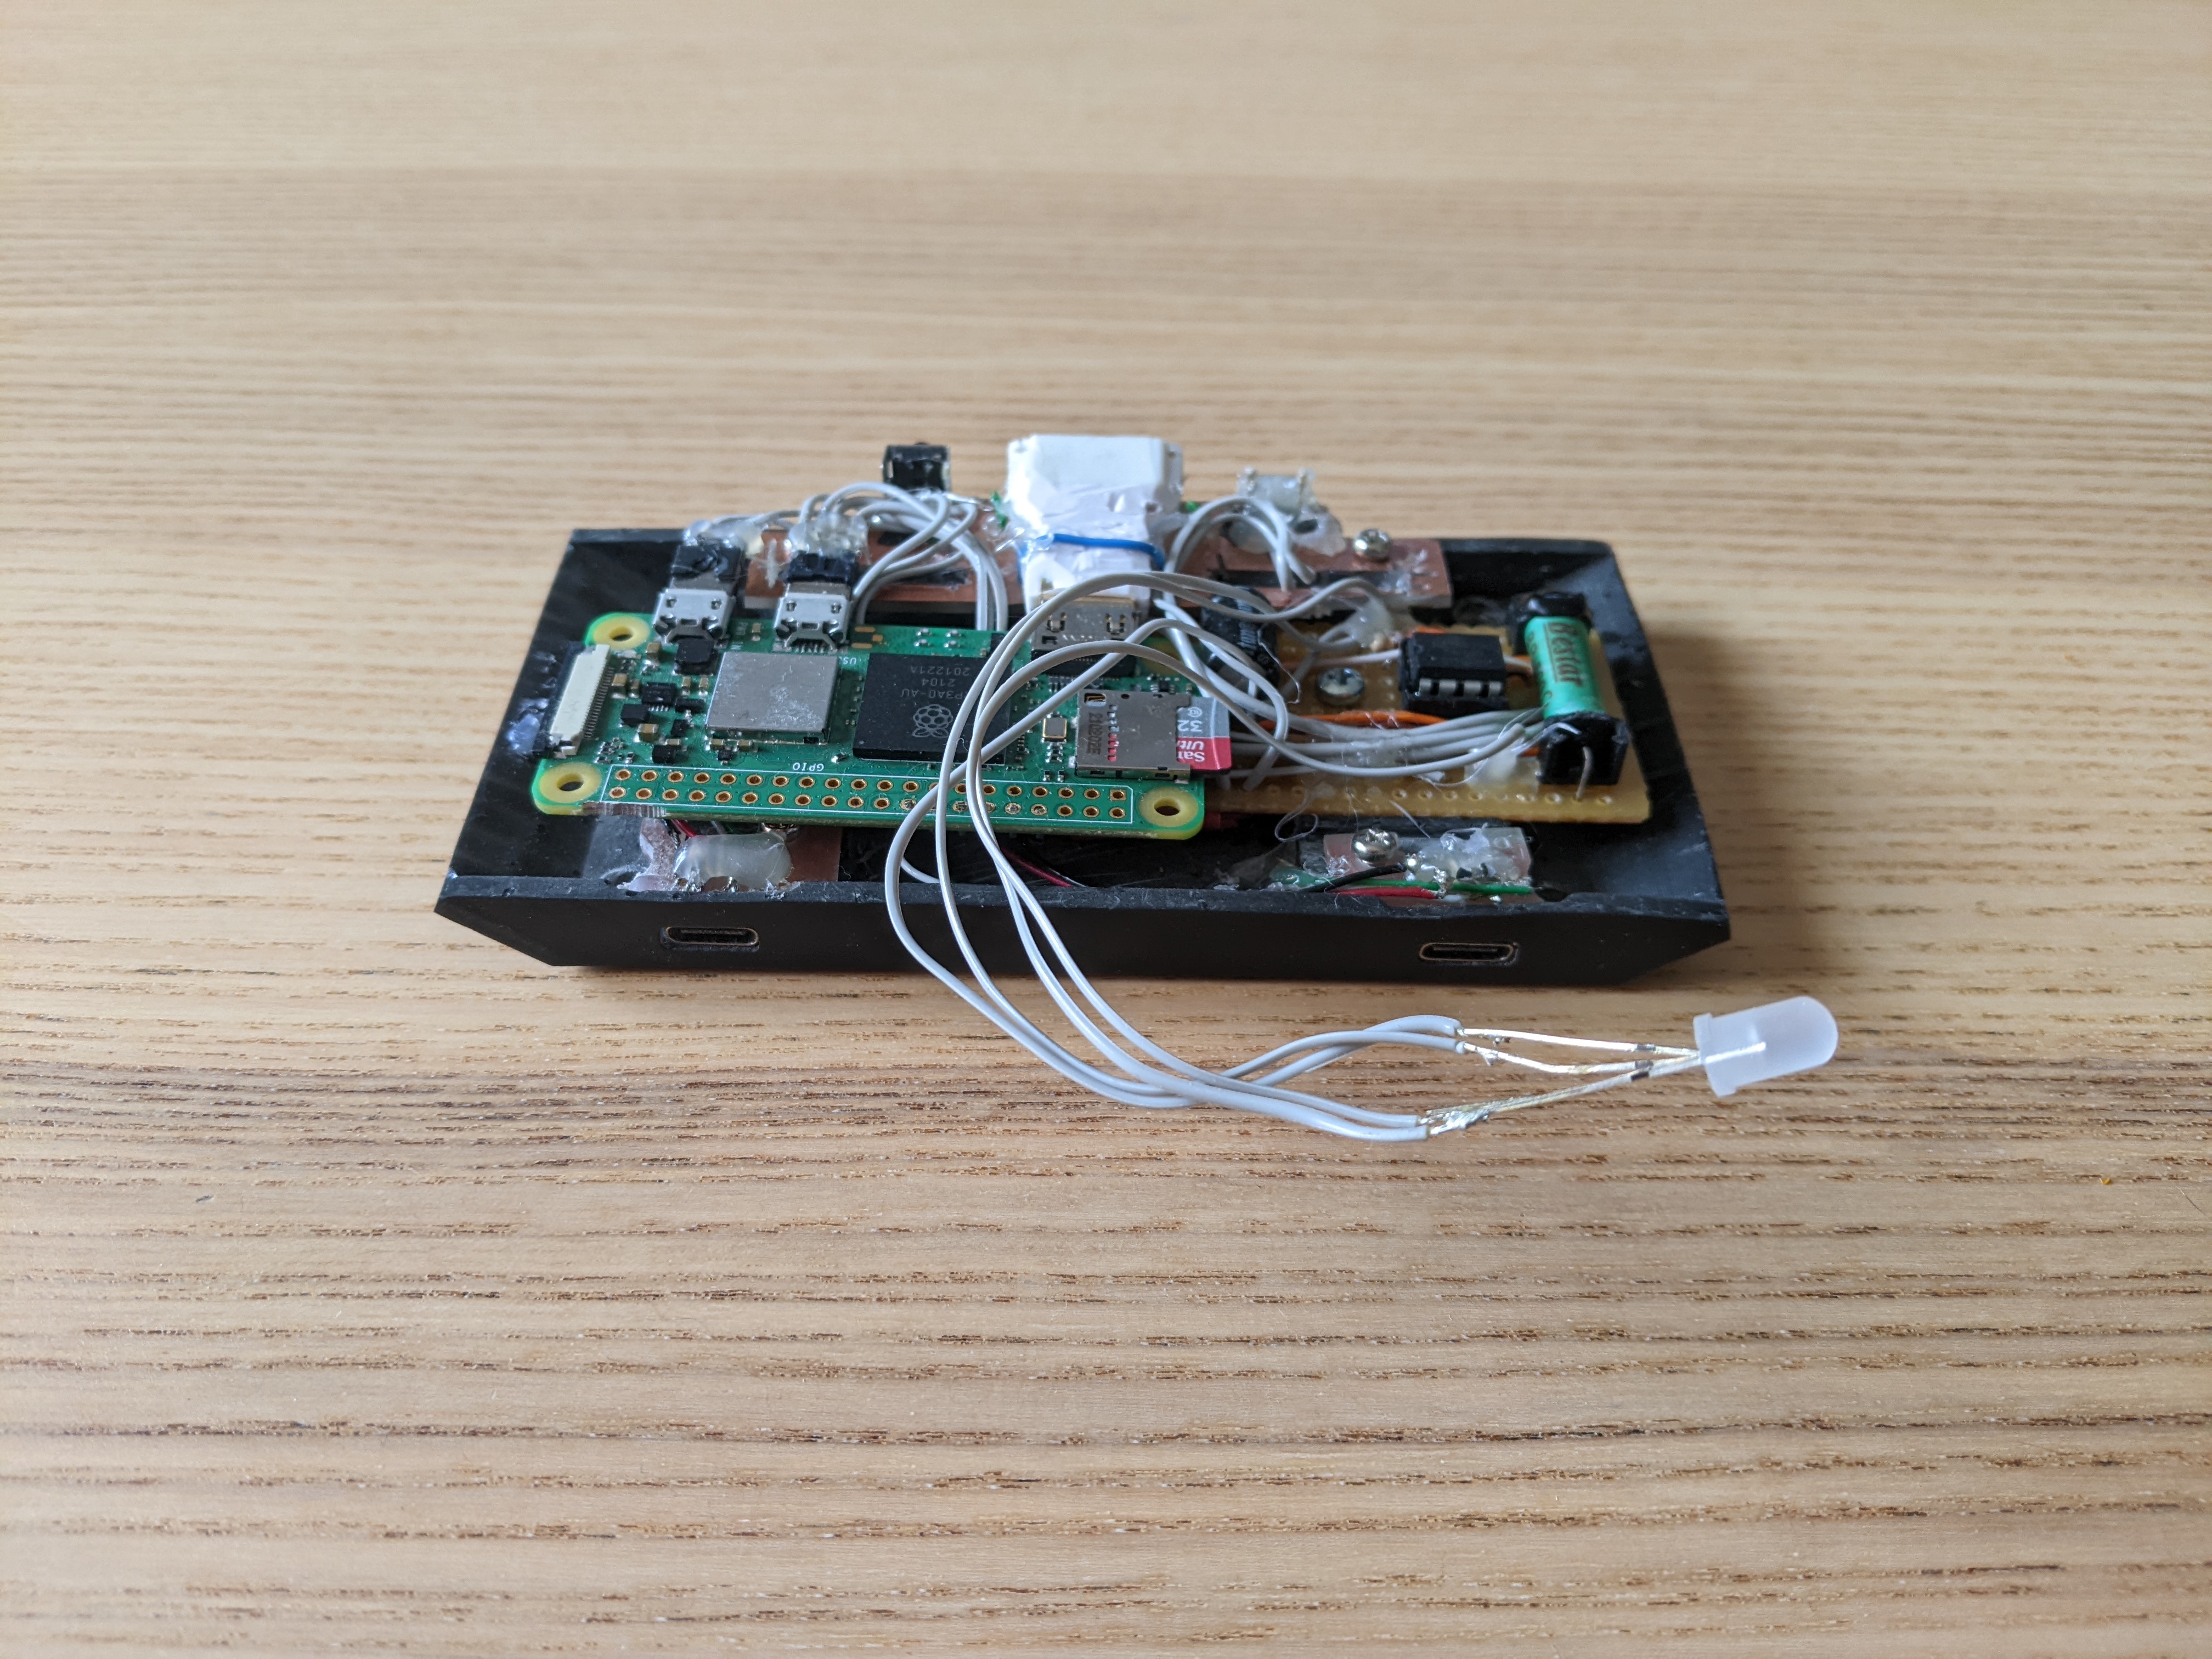
Inside is a raspberry pi W v2, rgb led, 2 USB c ports (very fiddly to solder), ATTiny85 to control the RGB and cut the power to the device using a reed switch, a usb hub (not shown) that expands the pi's port number to 2

The rpi talks to the ATTiny by turn a pin HIGH and LOW using a one wire protocol (I ran out of pins on the ATTiny so this was needed)

Software wise I built the application in Flutter and used flutter-pi to run it because I didn't want to have to install a desktop environment for one application.
Support for things like search and interfacing with the ATTiny85/joysticks is through some Python scripts. Game info and user preferences I save in a SQLite DB.
The actual playing of the games is through retroarch in cli mode: https://docs.libretro.com/guides/cli-intro/
It looks like this generally:
- Run flutter app to find a game to play
- Write a retroarch config file with things like joystick info (whichever joystick picked the game is always player 1)
- Kill flutter app
- Start game using retroarch in cli mode
- Retroarch finishes when person exits game
- Start flutter app and rinse and repeat

Controller wise I got a replica joystick off Aliexpress and added another ATTiny85 but programmed as a joystick (hidden at base of controller)

What the controller circuitry looks like (it's a basic usb circuit)
Idonotbelievewehavecompany
I still have my original Atari 2600 and 5200, I just use these to play games when I get bored.
jodomakes
lucky you! family had the 2600 junior when I was growing up; played a lot of centipede and laser gates