JaguarWong
5581
43
1
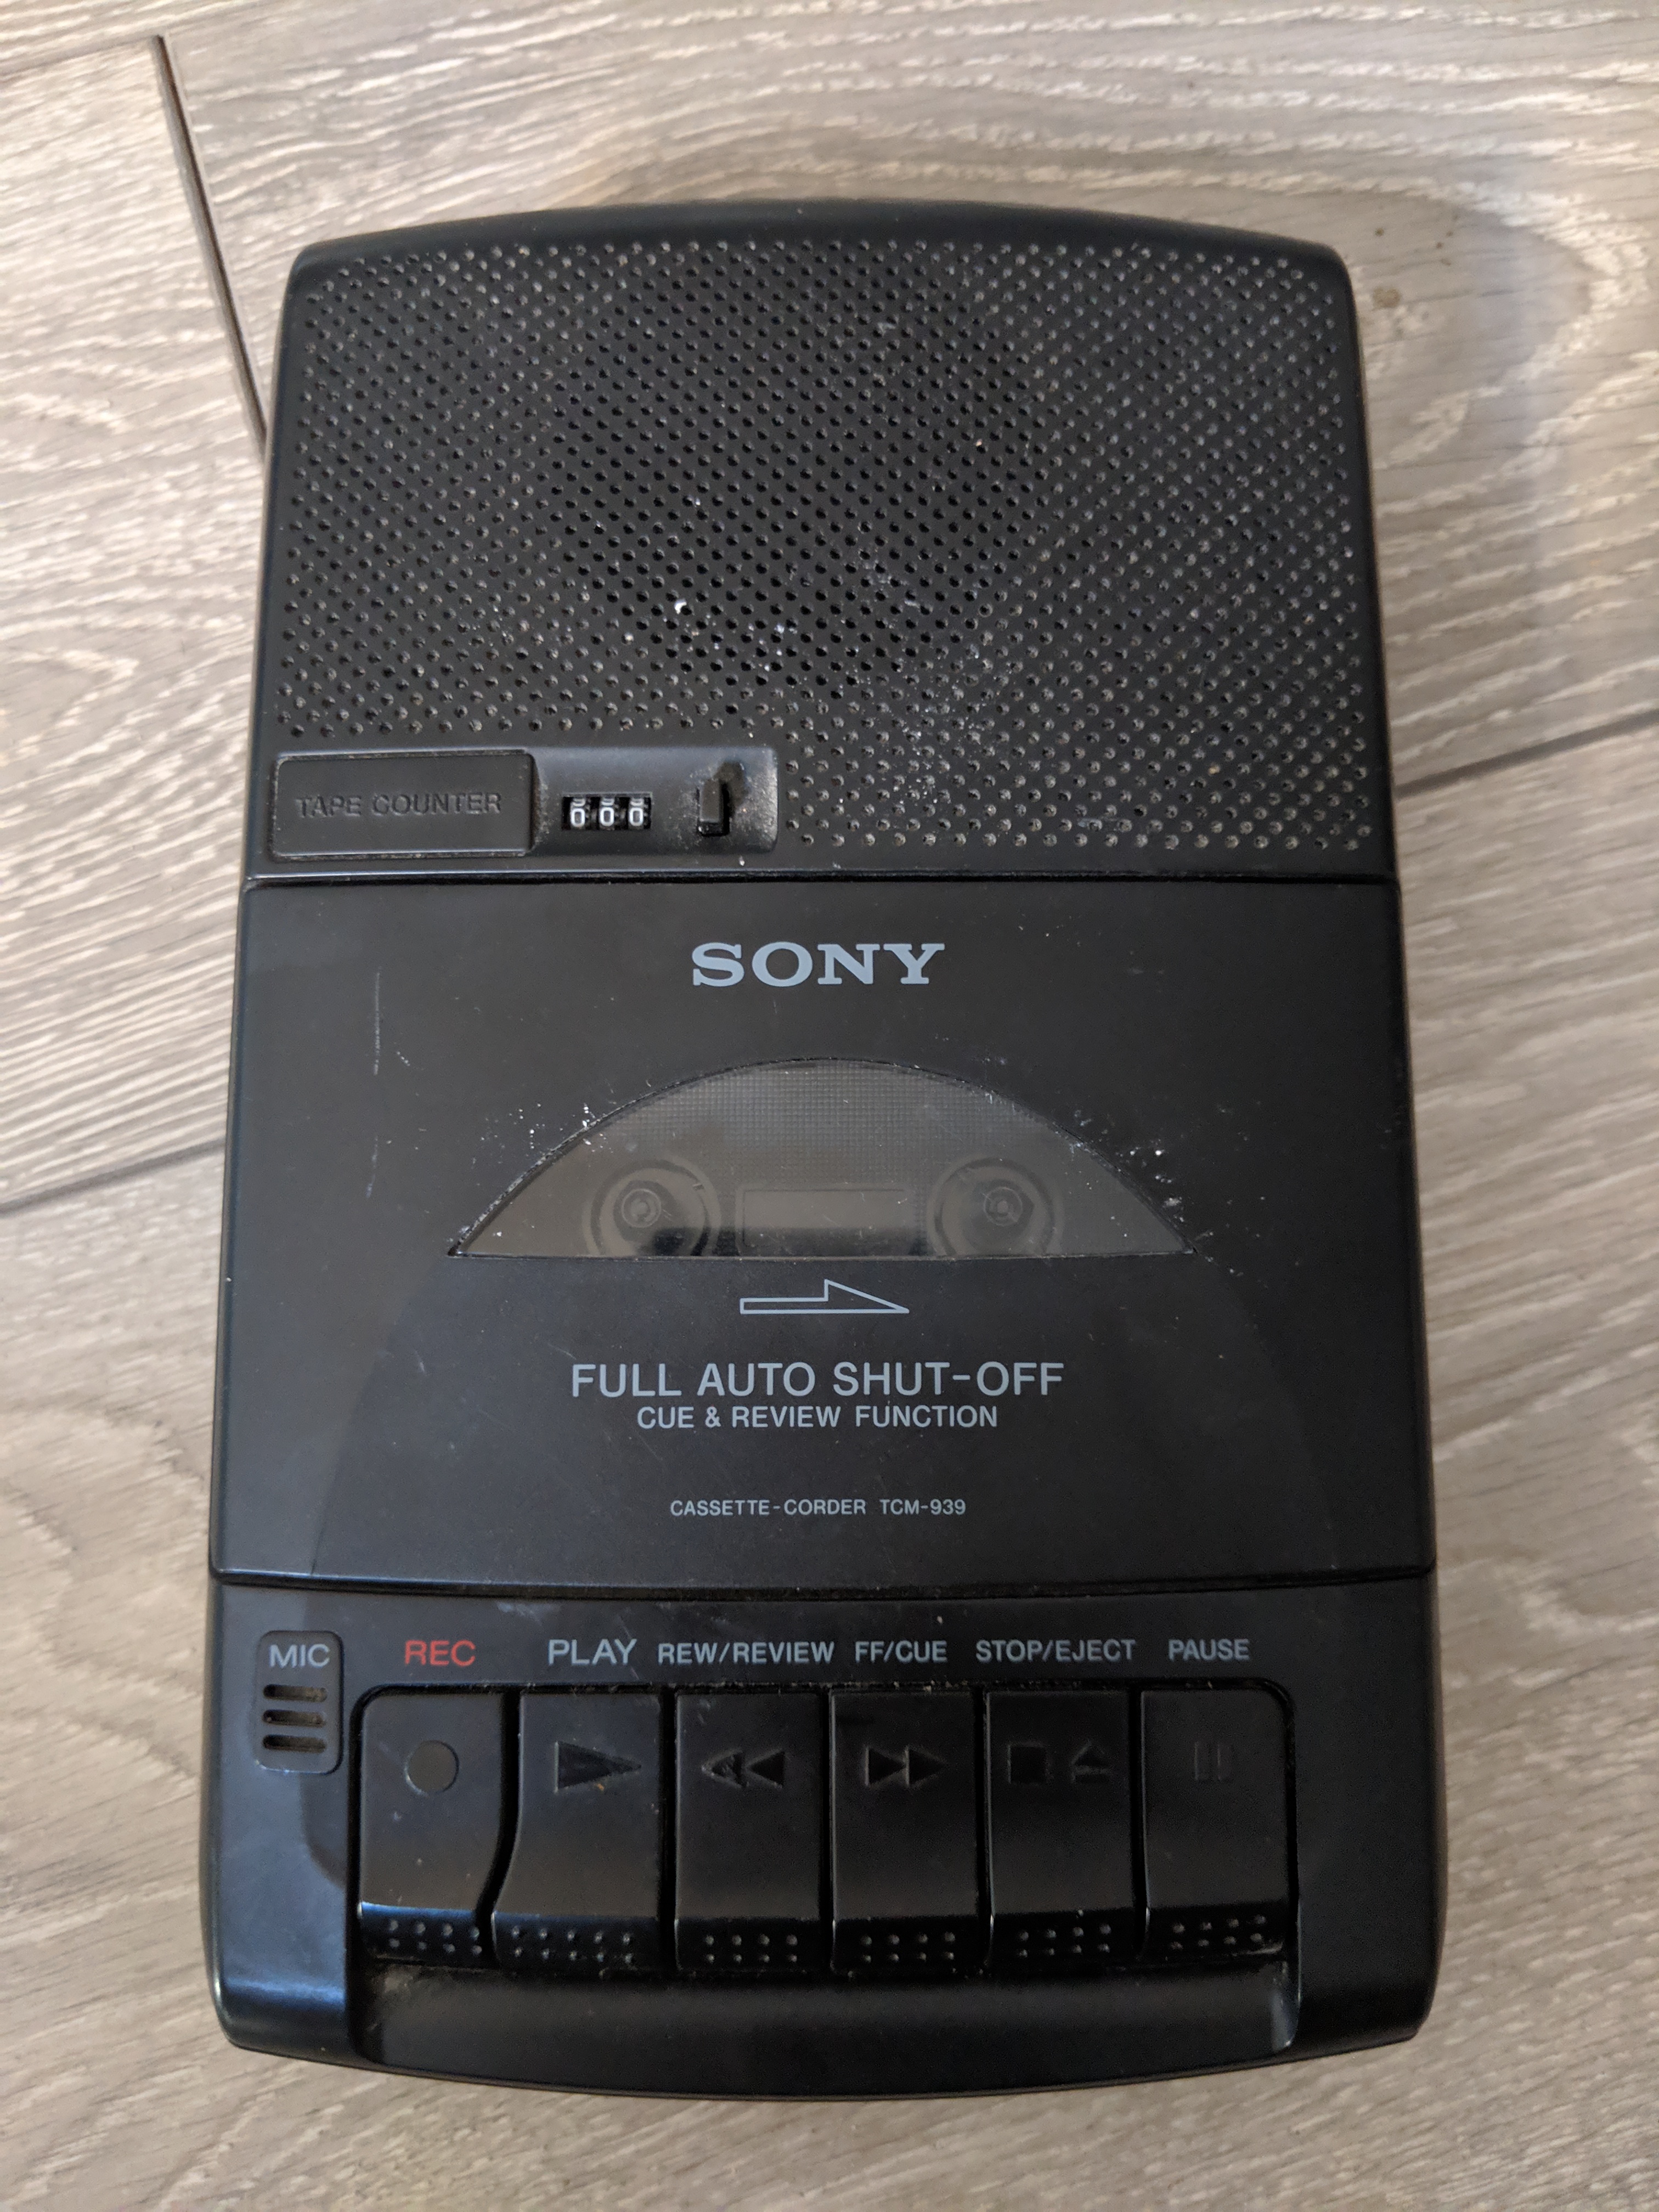
This is an old Sony cassette player I picked up from a boot sale last year for three quid.
Mechanically it worked fine, but no games would load from it.

I decided to use the shell to build an image loader deck.
I like to take on this sort of thing as a minimum cost project - mostly because limiting resources makes things more fun and you have to think on your feet.
She was in really good nick inside...

...but I don't need any of that!

First job: take the tape door off - the little gear is the soft-eject mechanism.

There was a lot of cassette holding bodywork and other plastic flanges inside the door... I'm not going to need any of that either...

I scored, snapped, and sanded away all the noise. Later on I would further cut into this to make it a flatter surface.

I also had to remove a lot of excess plastic from the tray area to make extra space and allow cable access from the rear.
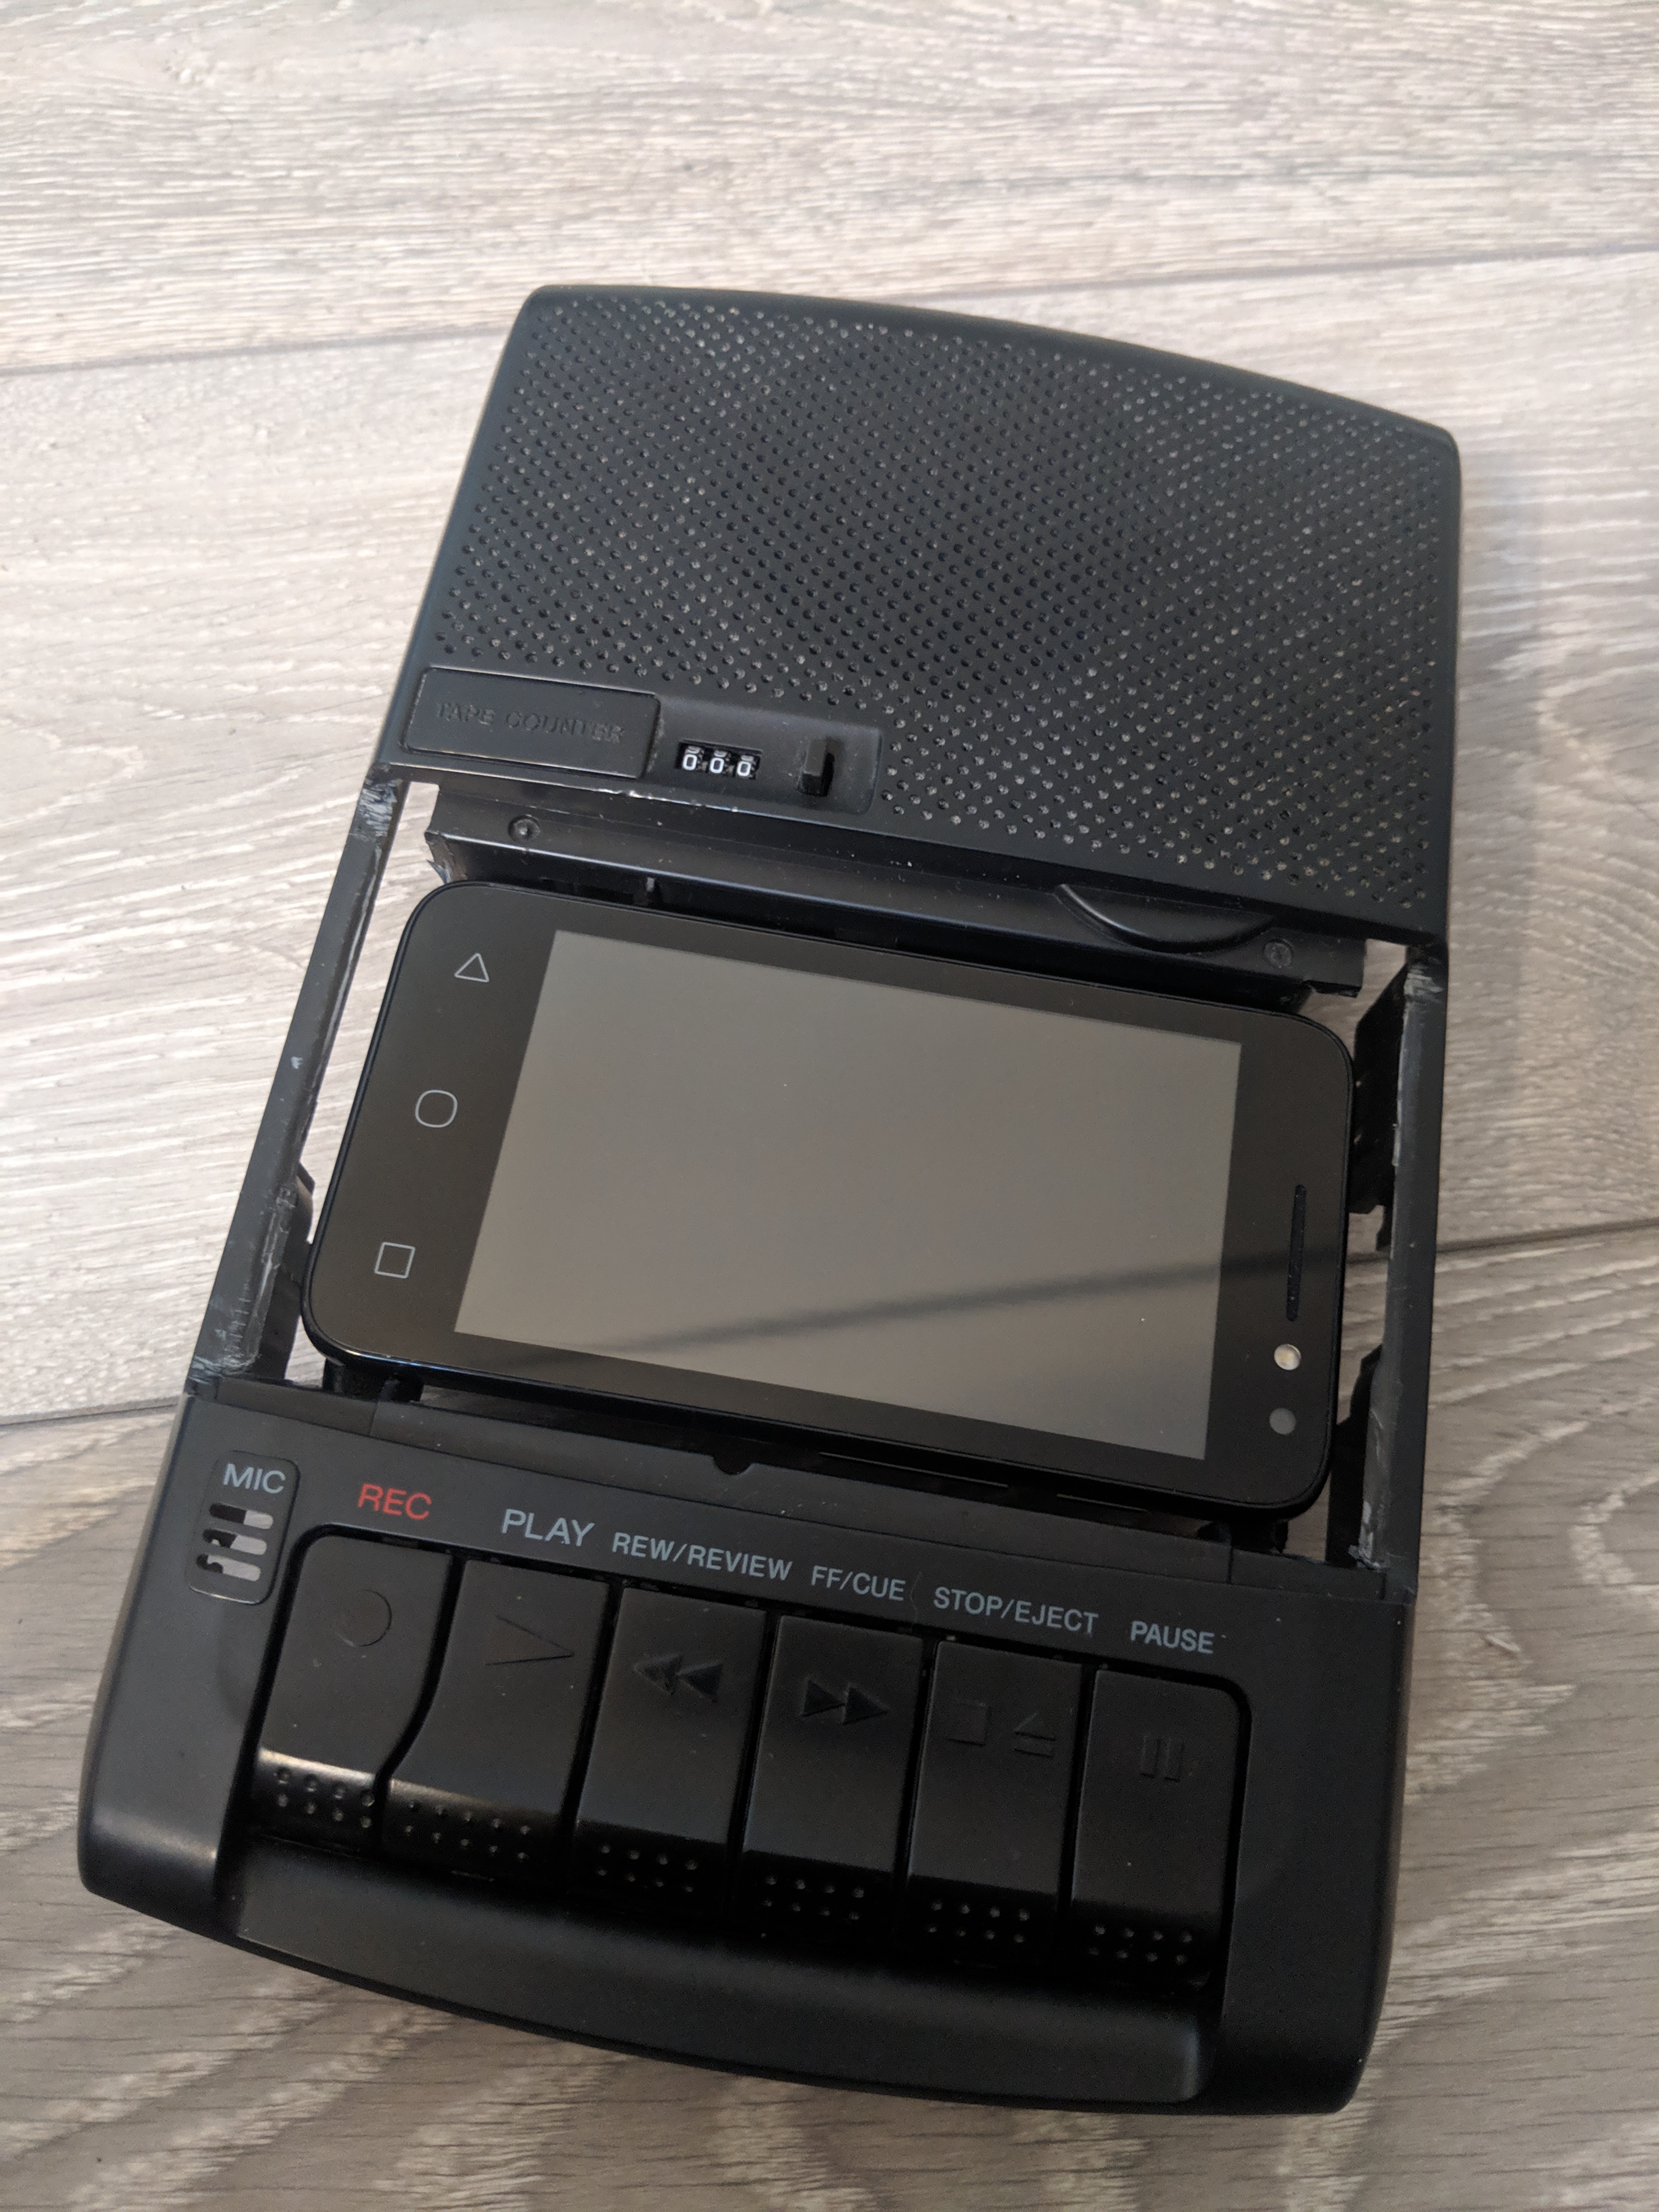
And this is my digital loading device - an Alcatel Pixi 4 that I picked up for £8 from eBay (they're only about £20 brand new). It's a near perfect fit in terms of both the body and the 4 inch screen size.
It also runs Marshmallow which, although relatively old, makes it compatible with most recent apps - which will be important later.
With that said I uninstalled or disabled as many apps as possible as this phone is NOT a powerhouse; it runs a Mediatek MT6580M (28 nm) Chipset, Quad-core 1.3 GHz Cortex-A7 CPU, and a creaky Mali-400MP2 GPU.

I was keen to have all the connections available from the outside of the unit so I bought this small extension for a couple of quid, stripped away all the plastic, and re-soldered the female end to make it mono. I did the same with a usb cable but forgot to take pictures.

This ended up moving for the final configuration but you can see the idea here

On the back of the top casing I added these four screws to adjust the height of the phone inside the tray. The unused buttons are temporarily taped in place while the glue dries.
But I had an idea for the two buttons left loose...

And this is the prototype - The idea I had was to use the cassette button mechanism to push against the power button of the phone, it took a lot of fiddling around but eventually...

...this MDF and rubber band arrangement is my final version of the On/Off switch for the phone. The bands are looped around screw and alignment pillars into which I cut notches, when the top is on it will hold everything in place.

You can see the stripped down usb plugged in on the left. Predictably the wires broke off as I tried to squeeze it in here but luckily I had picked up an old soldering iron for 50p just last week for a different project.
You can see that even with all the rubber removed I still needed to reshape the body some more to fit the connectors in.
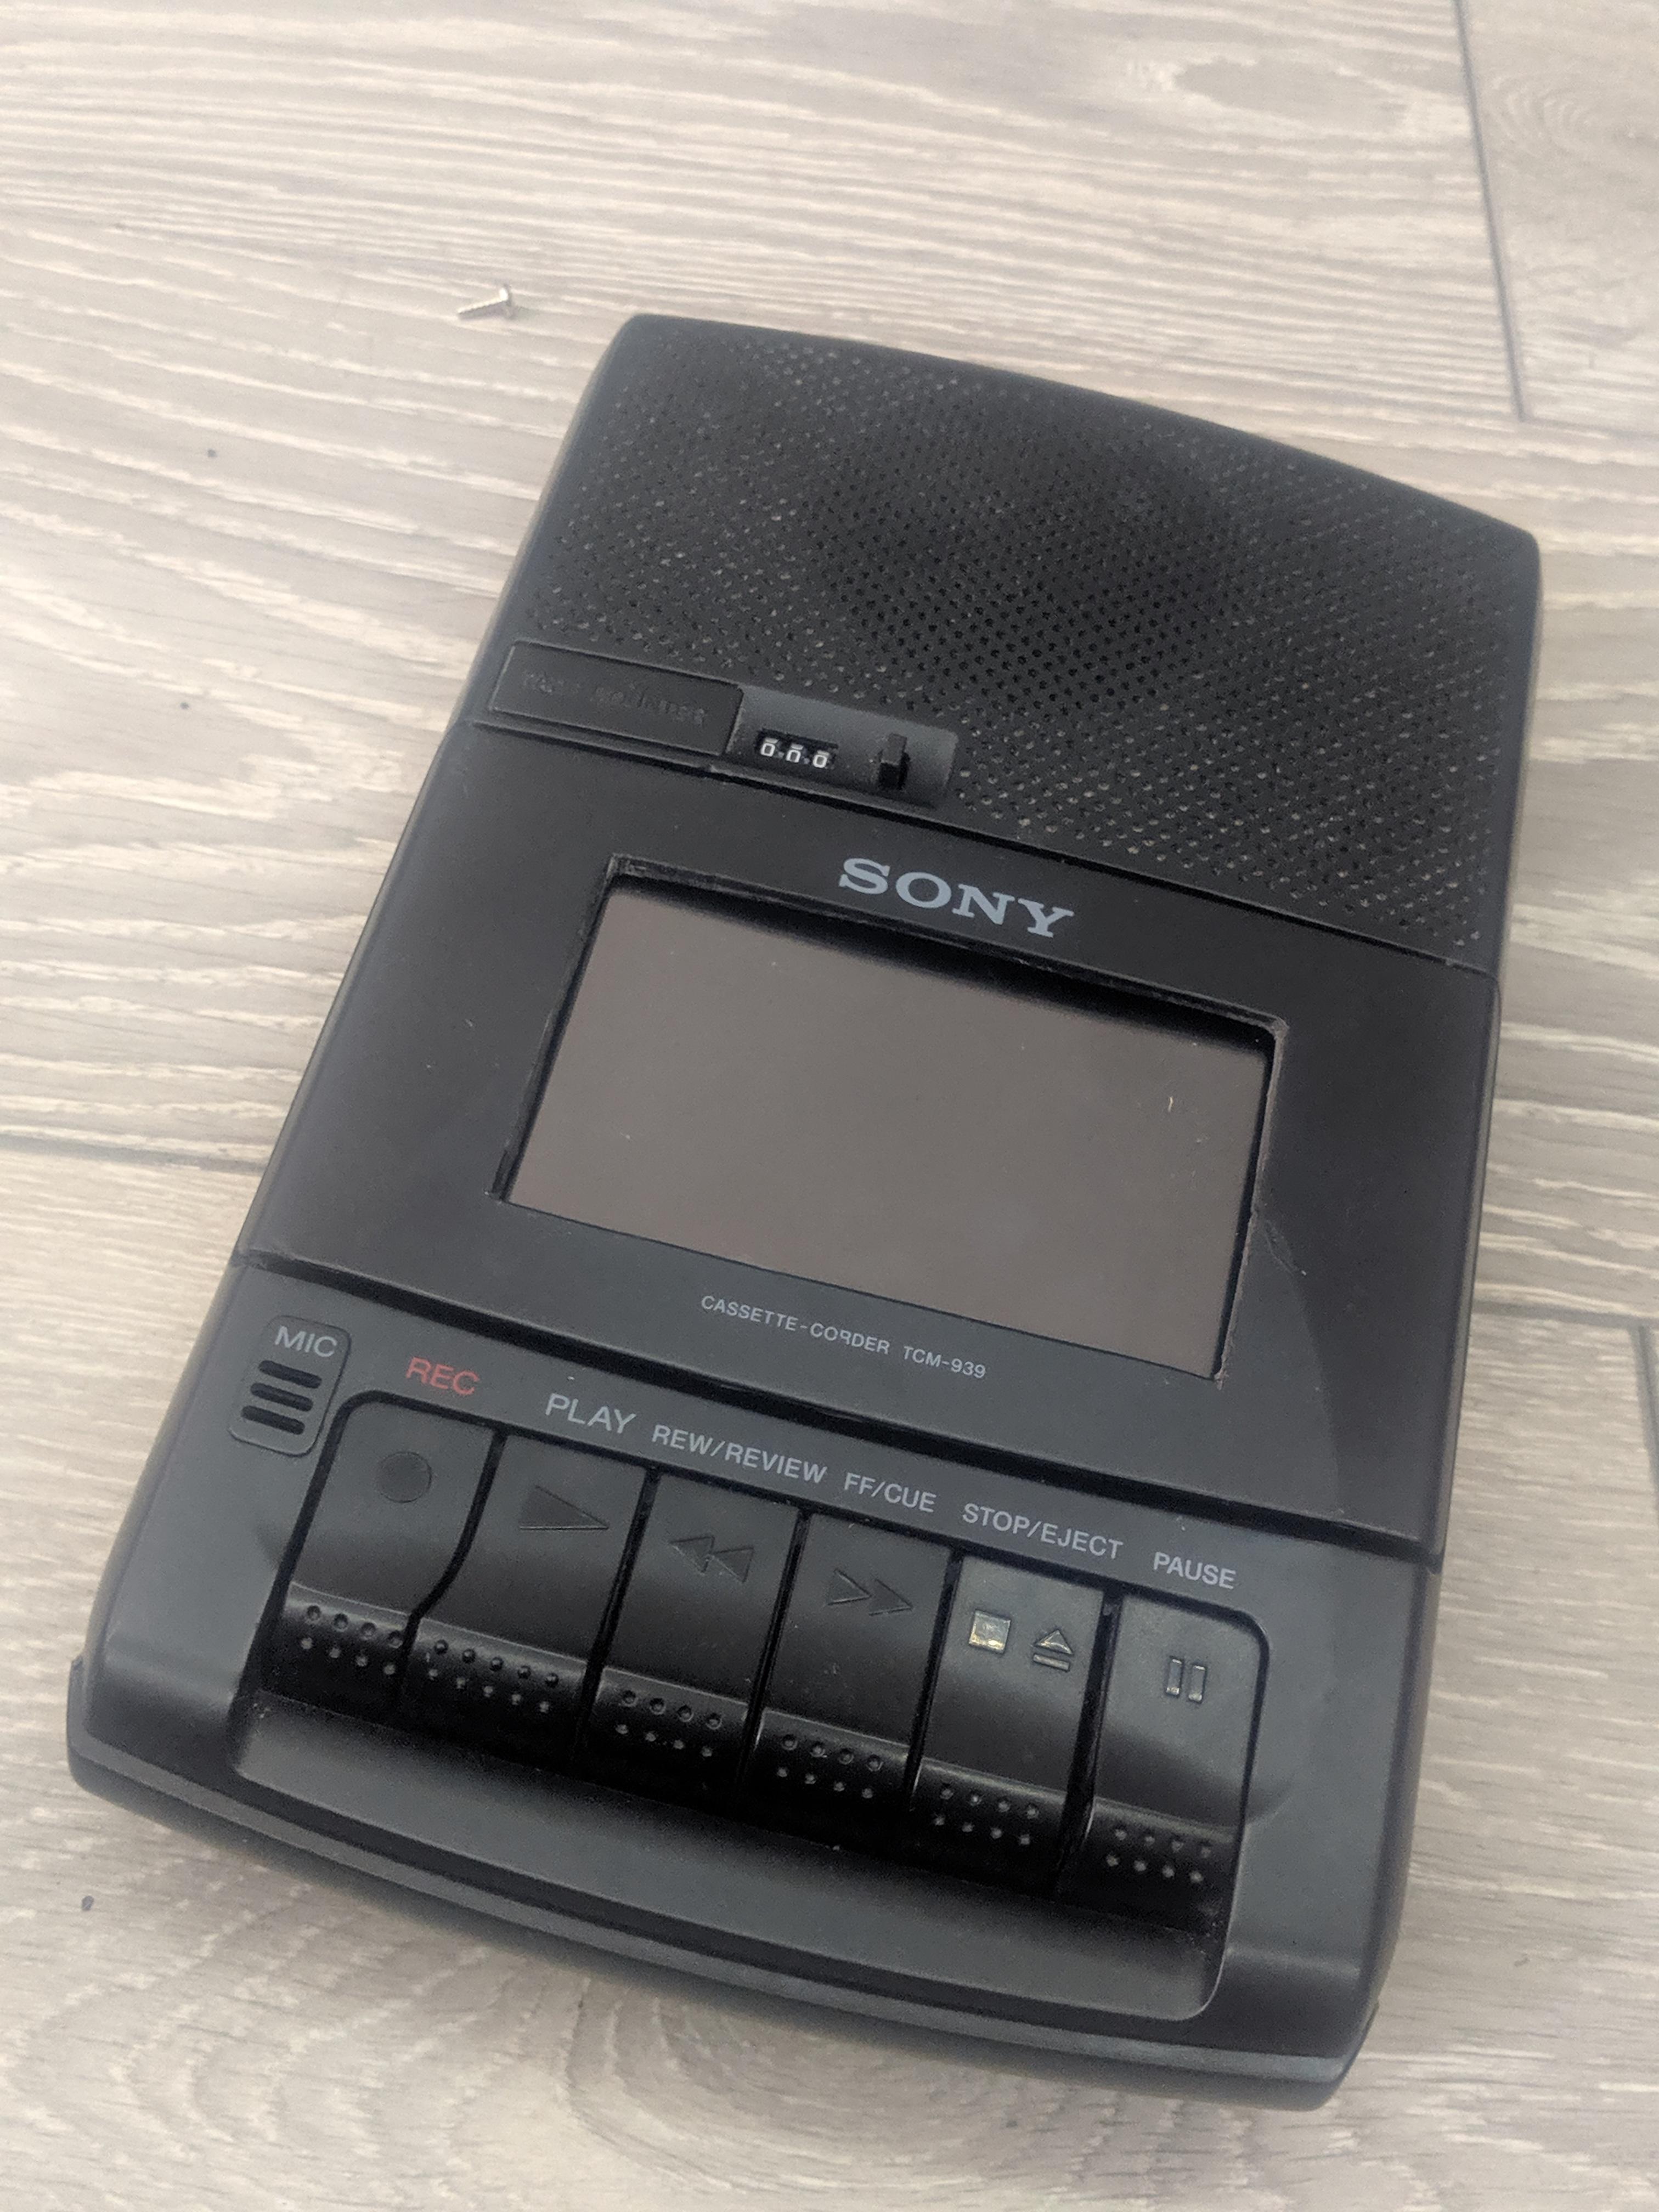
You can see the tip of the on/off mechanism in this image; just above the Stop and Pause buttons.
I left my phone indoors when I was out in the shed cutting the window but here's the result. I don't have a dremel or anything similar so had to use the multi-tool I bought for cutting into floorboards!
You can see I managed to buff out a few of the scratches and dings on the cassette cover using white spirit and a course towel - I'll need to clean out that speaker cover properly at some point too.

The power button in action

She Lives!
The app I'm using is called PlayZX, it's free and available on the Google Play Store, you can select any game from the Speccy library and load it directly - it even supports 2x turbo loading on compatible hardware. I have nothing to do with it or the developer (Baltazar Studios, LLC) but they deserve much kudos. There are other audio loaders available but this worked perfectly for my needs.
I also used another app to control the rotation of the phone screen and keep it landscape (and technically upside-down) and I've installed a screen sharing app in case I need to fiddle around with the settings in the future.

On this side you can just see the usb power socket. The screw holds the socket in place (and may be replaced if I can find something prettier) and due to this I had to move the 3.5 socket down a little - glad I was able to make use of the original holes though.

And finally here's a crappy gif of her up and running - all needs a clean and tidy up but I'm really pleased with the result.
Gameordie
Very nice.
Hoeloe
Heh. That was an unexpected nostalgia shot. I used to own exactly that cassette player.