swedishwoodworker
1730
18
3

And another just for the hell of it. This was very much a prof of concept project for me, and I'm quite happy with the result. Furniture joiner is a big intrest of mine, and nowhere is that art more masterfully applied than in older chinese furniture. This attempt of mine to build a piece using that style of joinery is absolute childsplay compared to the actual historic ones and I recomend anyone intrested in joinery based woodworking to check out the chinese tradition. It's much harder to find info on in english than for example the japanese tradition but the book I mentioned earlier is a good starting point. And if you made it all the way here I comend your attention spann, good work!

First the complete table, made out of merbau wood, and loosely based on a historic chinese furniture from the amazing book "chinese domestic furniture in photograph and measured drawing" by Gustav Ecke.

It's made with apropriate classic joinery methods such as the fully mortised threeway miter,

sliding dovetail reinforced panels for tabletop, (this is by the way the most fundamentaly superior aspect of traditional chinese joinery as compared to other tradition as the sliding dovetail transfer the strength of the panel to the frame, somthing conventional western frame and panel constuction does not. Overkill on this small table but gamechanging on a large armoir door or simular)

and mortised swordtip miters for the lower stretcher.
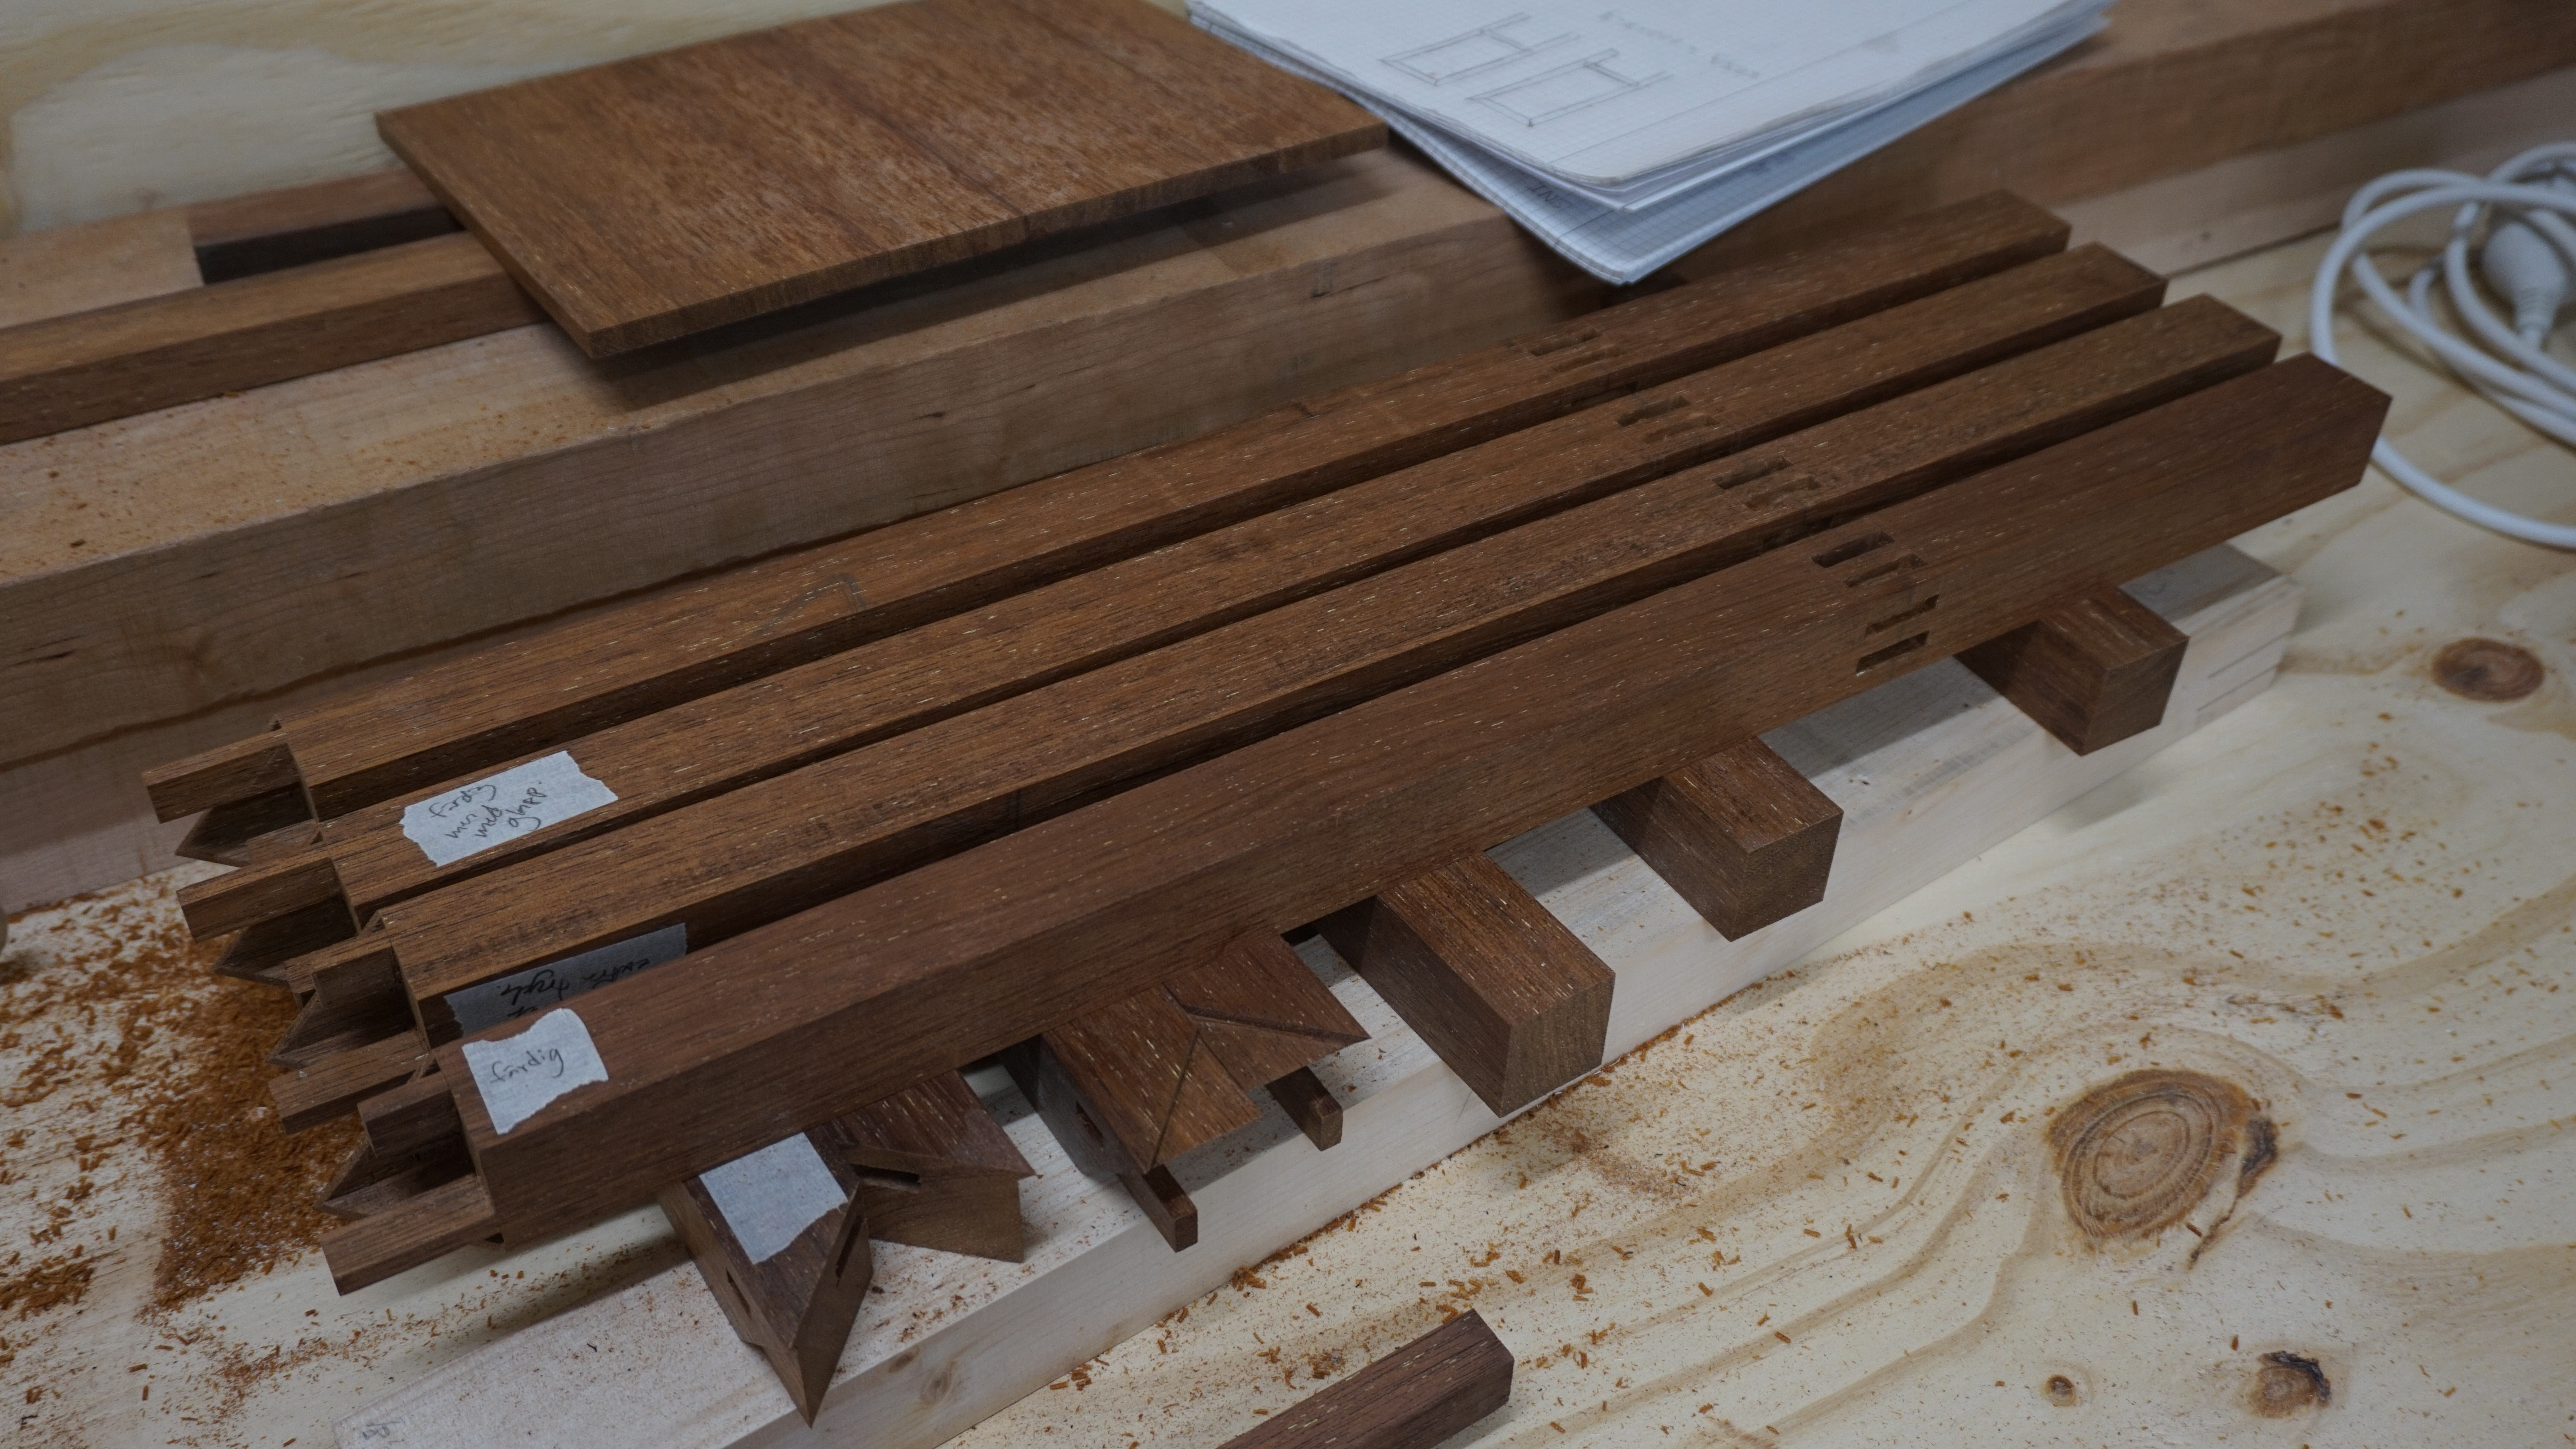
unfortunately I had no camera for the first half of the build, so here is the parts with the top miters are already made.

First cut for the stretchers were made on a tablesaw sled,
and so was the tennons.
Followed by hand cleanup with chisel.

The pieces both before and after the cleanup.

The mitered receiving socket on the legs was hand chopped with the help of a simple guide.
Note that by placing the main tennon towards the outside one can maximize the uninterrupted deapth while the stubb tennon closer to the back make sure no twisting will take place over time.

The joints were test fitted individualy.

And went together largely as planned.

Time for the "router table" nothing fancy here.
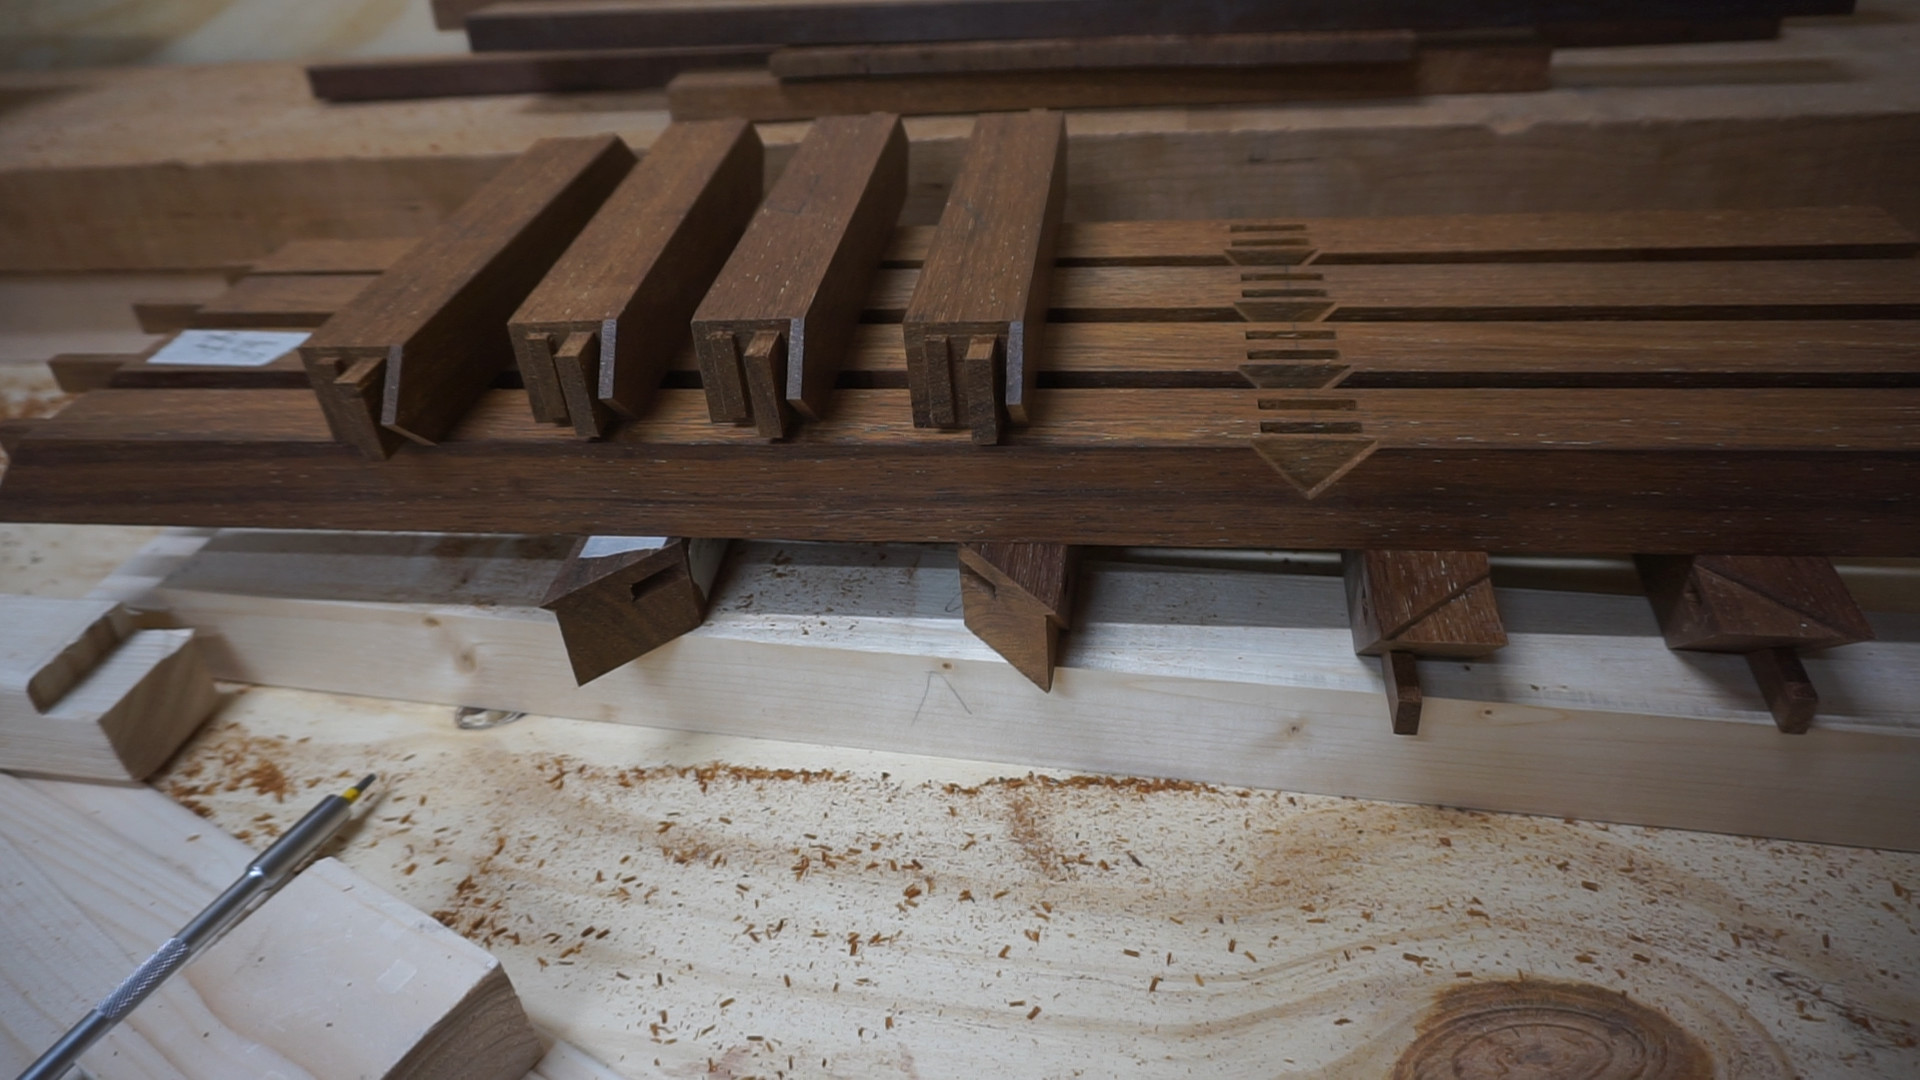
After some routing here is the tapered sliding dovetail. The tapered version of this joint is acctually easier to fitt than the regular version, just make it to long and be carefull with the angel and it takes care of it self.

Some tennoning later with a scale. The sliding dovetail is 2,5mm (about 3/32" ) deap, yet it provides a suprising amount of strength. The dovetail portion also protrude further than the tennon shoulder...

This is so it can continue into the slot keeping the top in the frame.
Test fitting of the topp
And a first and last "dress rehearsal" fitt before glue up
And it goes together!

So after knocking it apart again it's time for handplaning to prep the sufaces.

Finaly the glue up, which a made in to parts. First the base...

and then the topp
Some clean up later a danish oil finish to, well finish

A close up of the finished pieces
vanelanjenkins
DIY IKEA furniture.
KeyMasher
As an amateur woodworker who is just starting to amass some decent tools, this is the stuff I love to see the most. Thanks for sharing, man.
swedishwoodworker
Glad to see it was appreciated, and good luck to you woodworkig and tool acquiring ventures
BramGallagher
The Ecke book is a valuable resource. This is a good practical demonstration also.
swedishwoodworker
Thanks man! and yes it's a great book!